Category: Buyers guide

  • Do You Really Need a Dropper Post on your Mountain Bike?

    A dropper post was once the kind of thing you’d only find on £3,000+ mountain bikes, the sort of premium feature that made you jealous when you saw it on someone else’s ride. Now it’s the single upgrade that most transforms how you ride a mountain bike. If you’re riding anything resembling proper trails and you don’t have one, you’re fighting your bike on every descent.

    Mountain Bike Dropper Post

    A dropper post is essentially a telescoping seatpost that you control with a lever mounted on your handlebar. Press the lever, apply your weight and the saddle drops out of the way. Press again without your weight and the saddle comes back up. Simple concept, but the riding difference is profound. This isn’t about convenience or looking pro. It’s about capability and confidence. Your saddle at climbing height is perfect for pedaling efficiency but becomes a dangerous obstacle the moment you point downhill. A dropper post means you can have both: saddle up for the climbs, saddle down for the descents, all without stopping or reaching down to fumble with a quick release.

    This guide covers when you genuinely need a dropper post, when you can skip it, and why bikes that include them as standard are offering far more value than you might realise.

    What Actually Is a Dropper Post?

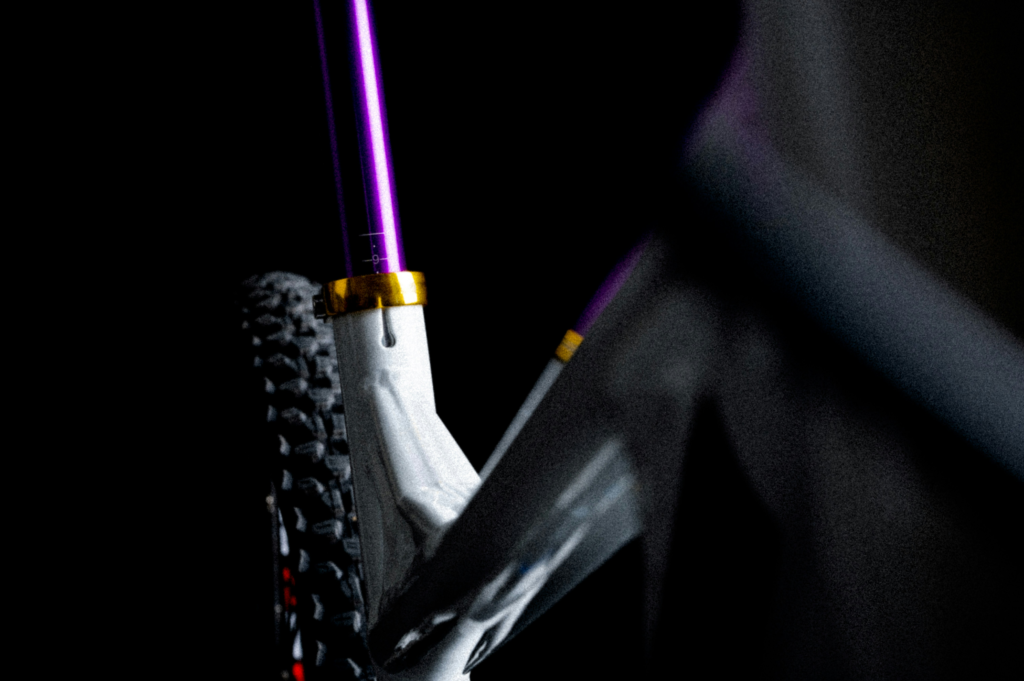
    At its core, a dropper post is a seatpost with internal cartridge that allows it to telescope up and down. You control it via a lever on your handlebar, usually positioned where your thumb naturally rests. Press the lever, sit on the saddle slightly applying pressure, and it drops. Press the lever again with your weight out the saddle and it springs back up to your preset height.

    The mechanism can be cable-actuated (like a gear shifter) or hydraulic (like a brake). Cable is perfectly adequate and easier to service. Hydraulic is smoother but more expensive and harder to bleed if problems arise. Most riders won’t notice the difference.

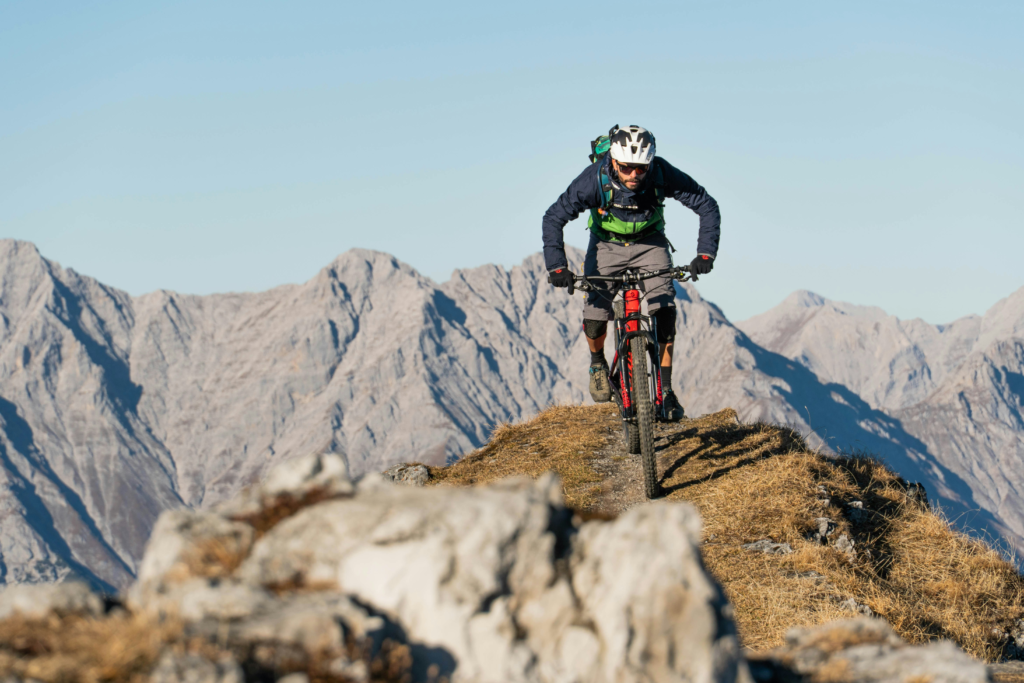
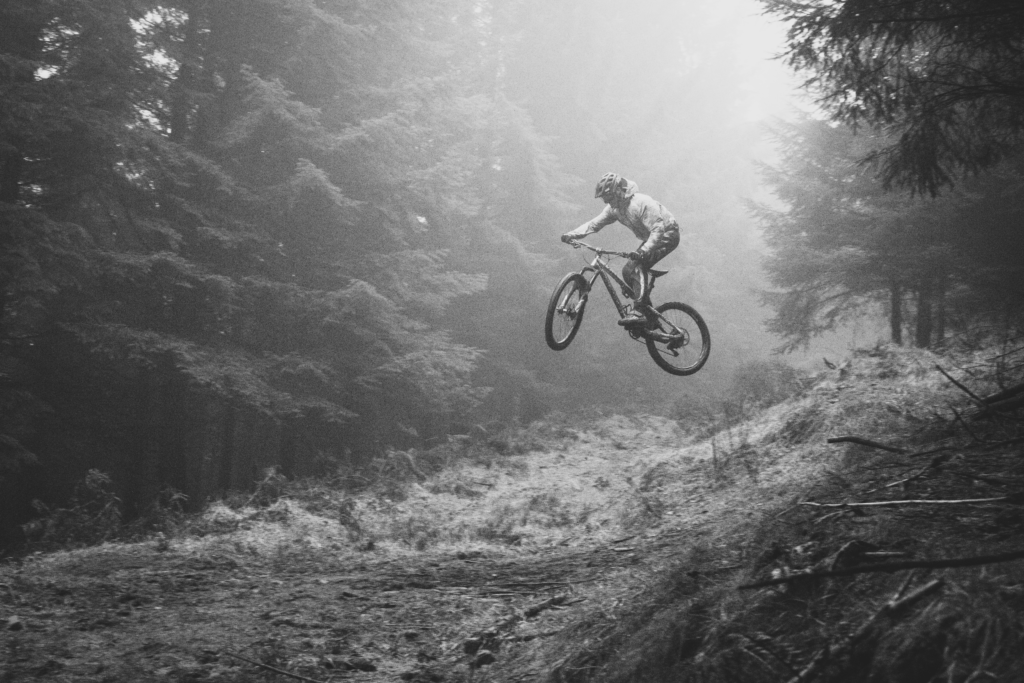
    The physical difference between riding with your saddle up versus down on a descent is stark. Imagine trying to navigate technical terrain, rocks and roots coming at you, while sitting bolt upright with a saddle jammed into your inner thighs. You can’t shift your weight back. You can’t get low. You’re perched on top of the bike rather than moving with it. Modern slack trail geometry expects you to move around on the bike, shifting weight behind the saddle on steep sections. You simply can’t do this with the saddle in the way.

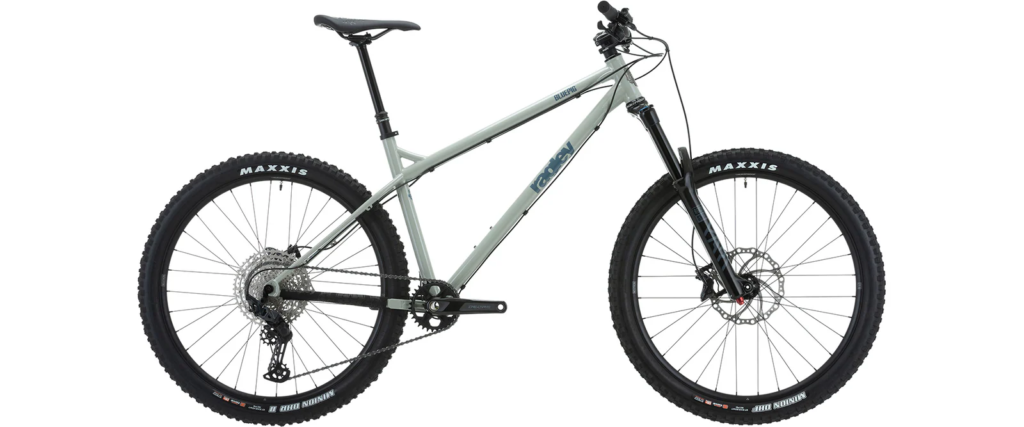
    Dropper posts used to cost £300-500 as an aftermarket upgrade. Premium ones from Fox or RockShox would push toward £400. They were aspirational purchases. Now they’re increasingly standard on mid-range bikes, which has completely changed the value equation when comparing what different bikes offer at the same price.

    When You Absolutely Need a Dropper Post

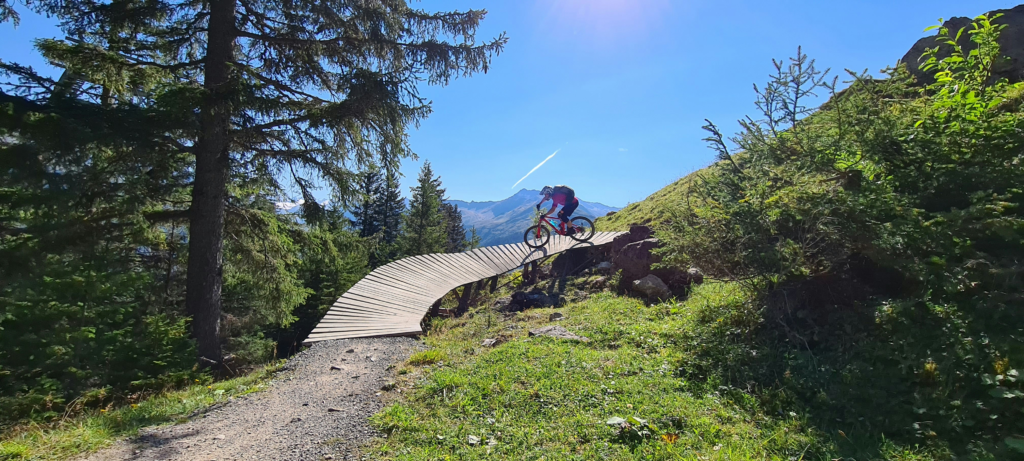
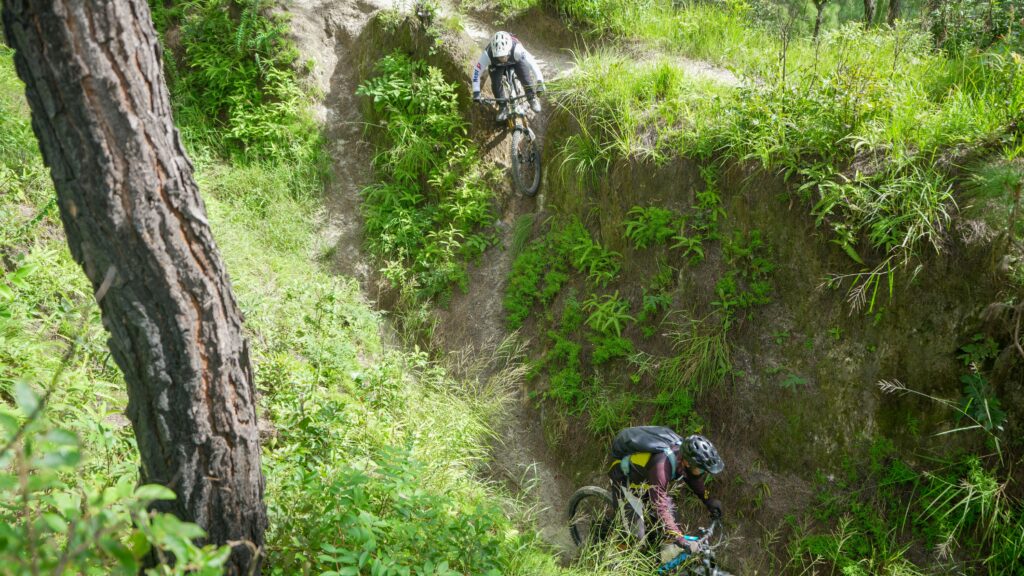
    If you ride proper trails with any kind of descent, you need a dropper post. This isn’t gatekeeping or elitism. It’s just reality. Any trail with rocks, roots, drops, or genuinely steep sections becomes dramatically easier and safer with your saddle out of the way. The saddle position that’s efficient for climbing is actively dangerous for descending anything technical.

    Modern trail bike geometry is designed around the assumption that you can move your weight back and low on descents. A 66-degree head angle and long reach make sense when you can shift behind the saddle. They’re uncomfortable and unstable if you’re stuck sitting on it. You’re trying to ride a bike that’s geometrically designed for a riding position you can’t achieve.

    If you want to progress your riding skills, a dropper post stops being optional. Manuals, wheelies, and jumps all require the saddle to be out of the way. Cornering technique improves dramatically when you can drop your weight and lean the bike beneath you. You can only ride to the level your equipment allows, and riding without a dropper artificially caps your capability. You’ll plateau not because you lack skill but because you’re mechanically prevented from executing proper technique.

    If you ride anything described as “trail,” “enduro,” or “all-mountain,” the bike categories themselves assume dropper posts now. These aren’t XC race bikes where you’re seated and pedaling 95% of the time. They’re bikes built for varied terrain, and varied terrain means descents. The geometry is designed around being able to move your body position dynamically.

    If you ride bike parks or jump lines, a dropper post is non-negotiable. This is a safety issue as much as a performance one. You cannot safely session jumps or drops with your saddle at pedaling height. It’s not just harder, it’s asking to be injured when you inevitably catch the saddle on your inner thigh or get bucked forward over the bars.

    The first ride after adding a dropper post is revelatory for most people. Sections you’d been walking for months suddenly become rideable. It’s not that you improved overnight. You just stopped fighting your bike.

    When You Don’t Actually Need a Dropper Post

    Pure XC racing on smooth trails is the main exception. If you’re literally never descending anything technical, if your riding is fire roads and flow trails where you’re seated and pedaling constantly, a dropper post is unnecessary weight. XC racers prioritise weight savings and climbing efficiency over descending capability, and that’s a legitimate choice for that specific type of riding.

    Casual riding on towpaths, gravel trails, or completely flat terrain doesn’t need a dropper post either. If your “mountain bike” never actually sees mountains or proper trails, if it’s essentially a rugged commuter, save the money. There’s no point spending on capability you’ll never use.

    Very limited budgets create harder decisions. If you’re choosing between a £600 bike with a dropper post but terrible fork and drivetrain versus a £600 bike with better core components but no dropper, the better core bike might be the right choice. You can add a dropper later. You can’t easily replace a frame or fork. But this is genuinely a tough choice, and it’s worth understanding the full cost before you commit.

    The Cost Reality: New Bikes vs Aftermarket

    Here’s where the value conversation gets uncomfortable for people who bought bikes without dropper posts. Adding a quality dropper post aftermarket is expensive in ways that aren’t immediately obvious.

    A decent dropper post costs £150-250. Cheap ones under £100 exist, but they’re often unreliable. They stick, they fail to return, they develop play. You end up replacing them anyway. The reliable brands are OneUp, PNW, RockShox, Fox, and Brand-X. These start at £150 and go up quickly.

    Installation costs £30-50 if you’re not confident doing it yourself, and dropper posts can be fiddly. Internal routing in particular requires feeding cables through the frame, which ranges from straightforward to genuinely difficult depending on your frame design. You may need to buy a compatible remote lever if your current one won’t work, adding another £20-40.

    Total cost for a quality aftermarket dropper setup: £200-320 realistically.

    Bikes that include dropper posts from the factory offer crazy value because the manufacturer’s bulk pricing means they’re getting that component far cheaper than you can buy it retail. They’re adding maybe £50-80 to their cost, but you’d pay £200+ to add it yourself. The dropper is already installed, routed correctly, with a lever that’s properly positioned. It’s under warranty. You just ride.

    This creates a fascinating value comparison. Take two bikes both priced at £950. Bike A has no dropper post. Bike B includes a dropper post. Bike B isn’t £50 more expensive than Bike A. It’s actually offering about £200 more value. If you bought Bike A and added a quality dropper, you’d spend £1,150 total for the same capability Bike B gives you at £950.

    This is why component spec matters so much when comparing bikes at the same price. Two bikes at £950 absolutely are not equal if one includes a dropper and one doesn’t. The dropper-equipped bike is either skimping elsewhere to hit the price, or it’s offering genuinely exceptional value.

    What to Look for in a Dropper Post

    Travel is the key spec. This refers to how far the post drops. 125mm is the minimum for trail riding. 150mm is better for aggressive riding. More travel gives you more room to move, which translates to more confidence on steep terrain. Your frame and riding style determine what you can fit and what you need.

    Actuation type matters less than reliability. Cable actuation is fine and works well on most quality posts. Hydraulic is smoother and requires less force at the lever, but it’s more expensive and harder to service when problems arise. Most riders genuinely won’t notice the difference in normal riding.

    Reliability is where brand reputation matters. OneUp, PNW, RockShox, and Fox are proven. Brand-X (Wiggle’s house brand) offers decent budget options. Unknown Amazon brands are false economy. A dropper post that sticks halfway through a descent or won’t return is worse than no dropper at all.

    Routing can be internal or external. Internal looks cleaner and protects the cable better, but it’s harder to service and install. External routing is easier to work on but more exposed to damage and muck. Neither is definitively better, but internal is becoming standard on modern bikes.

    Lever position should let you actuate the post with your thumb without moving your hand from the grip. This sounds obvious but poorly positioned levers are surprisingly common on cheaper bikes. You need to be able to drop the post while maintaining full control of the bike.

    The Upgrade Path Reality

    Many riders convince themselves they’ll buy cheaper without a dropper, then add one later if they decide they need it. This approach costs more money and limits your riding unnecessarily.

    Here’s what actually happens. You buy the bike without the dropper, telling yourself you’ll see if you need it. You ride for a few weeks or months on proper trails. You realise very quickly that you want the saddle out of the way on descents. You research dropper posts, get sticker shock at £200-300, wait a bit longer. Eventually you buy one, spend the money, deal with the installation hassle. Your “cheaper” bike now cost more than buying one with a dropper included from the start. You’ve spent months riding without a dropper, learning bad habits and limiting your progression, all to save money that you didn’t actually save.

    The better approach is simple: buy the bike with the dropper included, even if it costs £50-100 more upfront. You save money overall because you’re not paying aftermarket prices. You learn proper technique from day one because you can actually execute it. There’s no upgrade hassle, no installation concerns, no compatibility research. You just ride.

    The exception is if you’re genuinely unsure about your commitment to mountain biking. If this might be a bike you ride three times then leave in the shed, start cheaper and accept the limitations. But if you’re serious about trail riding, if you’re committed to actually using this bike properly, factor the dropper into your budget from the start. Trying to save £100 by skipping it will cost you £200 later.

    Real-World Benefits: What Actually Changes

    The confidence shift on descents is the most immediate difference. You can get behind the saddle on steep sections, weight distributed properly, arms and legs acting as suspension. This isn’t a subtle improvement. Features you’d been walking become rideable immediately because you’re not fighting the bike’s geometry anymore.

    Cornering transforms completely. Proper cornering technique requires you to weight the outside pedal, drop your weight, and lean the bike beneath you. You cannot do this with the saddle at climbing height. It’s physically in the way. Drop the saddle and suddenly you can corner the way technique articles describe, the way you see good riders doing it. Your speed through turns increases not because you got better but because you’re mechanically able to execute the technique.

    Technical sections become manageable rather than terrifying. Roots, rocks, drops, anything that requires dynamic body position suddenly works because you have the freedom to move. When the trail kicks you upward, you can absorb it through your legs rather than getting bucked forward into the bars. The saddle stops being an obstacle and becomes irrelevant, which is exactly what you want.

    Jump progression requires a dropper post. Any air time at all demands the saddle be out of the way. This is safety and progression both. You cannot safely session even small jumps with your saddle at pedaling height. You’ll catch it on your inner thigh, you’ll get thrown forward, you’ll land awkwardly. A dropper post isn’t optional for jump progression. It’s the baseline requirement.

    All-day riding becomes less fatiguing because you’re using the right tool for each section. Saddle up for the climbs where you want pedaling efficiency. Saddle down for the descents where you need freedom of movement. The transition is instant at the press of a lever, no stopping to adjust anything. This sounds like a small convenience but it’s the difference between riding fluidly and constantly compromising.

    How to Actually Use a Dropper Post

    Drop the saddle any time you’re going downhill, not just on steep descents. Even mild downhill sections benefit from having the saddle out of the way. The tendency is to think “this isn’t steep enough to need it,” but that’s wrong. If you’re going down and not pedaling, drop it.

    Timing matters more than you’d think. Drop the saddle before the descent, not halfway down when you realize you need it. You want the saddle down before you’re in the technical section, not fumbling with the lever while navigating rocks. This becomes automatic with practice but requires conscious attention at first.

    Lever position is crucial and often overlooked. The lever should sit where your thumb rests naturally. If you’re reaching for it, twisting your hand, or consciously thinking about lever position, it’s wrong. Small adjustments make huge differences here.

    The first few rides can feel strange, an extra thing to think about. This is normal. After a handful of rides it becomes completely automatic, as natural as changing gears. Don’t judge the dropper post on the first ride when everything feels weird.

    Common mistakes include forgetting to raise the saddle after a descent, so you’re pedaling seated with the saddle at minimum height. This is uncomfortable and inefficient. The flip side is not dropping the saddle enough – leaving it halfway doesn’t help much. If you’re descending, drop it fully. And the most common mistake is waiting until you’re in the middle of a technical section to realize you should have dropped it earlier. Think ahead, drop before you need it.

    The Bottom Line

    A dropper post stopped being a luxury somewhere in the past five years. It’s fundamental to how modern mountain bikes are designed and ridden. The geometry expects it. The riding style requires it. Trying to ride proper trails without one is fighting the bike constantly.

    When you’re comparing bikes at the same price, the presence or absence of a dropper post represents about £200 of real-world value difference. A bike that includes a quality dropper at £950 is offering significantly more value than a bike without one at the same price, assuming the rest of the spec is comparable. You cannot ignore this component when evaluating what you’re getting for your money.

    Don’t make the mistake of buying without a dropper, planning to add one later if you need it. You will need it. You will spend more money than if you’d bought a bike with one included. You’ll limit your riding unnecessarily while you convince yourself you don’t need it, then while you save up for it, then while you research which one to buy.

    If you’re serious about trail riding, make the dropper post a non-negotiable feature when shopping for bikes. Right now, clearance deals mean you can get bikes that include premium components like dropper posts at prices that normally wouldn’t include them.

    This is one component where the “I’ll upgrade later” approach costs you more money and limits your riding capability in the meantime. Buy the bike with the dropper. You’ll thank yourself on the first proper descent.

  • Mountain Bike Slang: A Comprehensive Dictionary

    Mountain biking has its own language. Listen to riders at a trail centre and you’ll hear talk of slackening head angles, running more sag, and sessioning features in the loam. If you’re new to the sport, it sounds like complete gibberish.

    Don’t worry. Every experienced rider started exactly where you are now, nodding along whilst secretly having no clue what anyone was on about. This glossary will sort you out. We’ve covered the terms you’ll actually hear and use, explained in plain English without the waffle.


    A

    A-Line – The harder, more technical route through a section of trail. Usually features a rock garden, drop, or gnarly obstacle. If you’re feeling brave, take the A-line. If you value your collarbone, there’s usually a B-line around it.

    Air – Being airborne, as in “getting air” on a jump. Also refers to air suspension (as opposed to coil springs). Context usually makes it obvious which one someone means.

    All-Mountain – Older term for what we now call trail or enduro bikes. You’ll still hear it occasionally, usually from riders who’ve been at this for decades.

    Apex – The turning point of a corner. The bit where you’ve finished turning in and are about to start accelerating out. Getting the apex right is crucial for carrying speed through corners.

    Armour/Armoured – Can refer to protective gear (neck braces, body armour, knee pads), or to sections of trail reinforced with rocks to prevent erosion. “That wash is properly armoured now.”

    Attack Position – Your body position when things get serious. Out of the saddle, dropper slammed down, chest low, elbows out, eyes looking ahead. If you’re not in attack position on steep tech, you’re about to learn why you should be.


    B

    Bail – To abandon a feature or jump mid-attempt, usually to avoid injury. No shame in it. Better to bail than to crash spectacularly.

    Berm – A banked corner built into the trail. Lets you carry way more speed through turns than flat corners. Brilliant fun when you get them right, properly humbling when you don’t.

    Bite Point – Where your brake lever engages and the brakes actually start working. If your bite point is at the bars, your brakes need bleeding.

    Blow Through/Bottom Out – When your suspension compresses completely and hits the end of its travel with a harsh thunk. Usually means you need more air pressure, volume spacers, or to pick better lines.

    Boost – A hub standard with wider spacing (110mm front, 148mm rear) that provides stiffer wheels. Most modern bikes use Boost. Older bikes used narrower standards. They’re not compatible, which is annoying when upgrading wheels.

    Bottom Bracket (BB) – The bit where your cranks attach to the frame. Also refers to the height of this point off the ground, which affects handling. Lower = more stable but easier to clip pedals on rocks.

    Brake Fade – When your brakes lose power due to overheating on long descents. More common on cheaper brakes or if you’re dragging your brakes constantly rather than using proper braking technique.

    Bunny Hop – Jumping your bike without a ramp. Front wheel up first, then scoop the back wheel up. Makes you look competent when done well, makes you look silly when done badly.


    C

    Case – Not clearing a jump properly, so your back wheel clips the landing. Can be harmless or can send you over the bars. Landing short is never ideal.

    Cadence – Your pedalling speed, measured in revolutions per minute. Higher cadence (90-100+ RPM) is generally more efficient than grinding away at low cadence, though it feels weird at first.

    Cassette – The cluster of gears on your rear wheel. Modern mountain bikes typically run 10-12 speed cassettes with wide gear ranges.

    Chain Slap – The noise your chain makes hitting the chainstay when riding rough terrain. Annoying but harmless. A chainstay protector sorts it.

    Chain Suck – When your chain refuses to release from the chainring and gets jammed between the frame and crank. Proper frustrating when it happens mid-ride.

    Chainstay – The tubes running from the bottom bracket to the rear axle. Shorter chainstays (425-435mm) make bikes more playful. Longer ones (440mm+) add stability and traction.

    Chatter – Rocky, loose trail conditions. Often describes the sound and feel of your bike bouncing over rough sections. See also chunder.

    Chunder – Proper rough, rocky, loose trail with debris everywhere. More severe than chatter. If a trail is chundery, it’s a mess.

    Chunky – Trail with lots of embedded rocks (as opposed to loose surface rocks). Technical and demanding.

    Chute – Steep, narrow descending section. Usually quite committing once you’re in it.

    Clean – Riding through a tough section without stopping, dabbing, or crashing. “She cleaned that entire rock garden first try!”

    Clipped In/Clipless – Pedals where your shoes attach via cleats. Called “clipless” because they replaced old-style toe clips, which confuses everyone. Brilliant once you’re used to them, terrifying at first.

    Coil – Coil spring suspension, as opposed to air suspension. Heavier but offers superb small-bump sensitivity and consistent performance. Popular on high-end bikes and with riders who prioritize feel over weight.

    Compression (Damping) – The bit of suspension that controls how fast it compresses when you hit something. Too much compression and it feels harsh. Too little and it blows through its travel too easily.

    Crank – The arms that connect your pedals to the bottom bracket. Usually 170-175mm long, though shorter cranks are gaining popularity.


    D

    Dab – Putting a foot down to avoid falling over, usually in a technical section or on a climb. Counts as a fail in trials riding, but most of us dab regularly and aren’t bothered about it.

    Dead Sailor – Locking up your body and arms in the air after a jump. Usually ends badly. Stay loose, people.

    Derailleur – The mechanism that moves your chain between gears. Front derailleurs are basically extinct on modern mountain bikes. Rear derailleurs do all the work now.

    Dialled – When something is perfectly set up or you’ve mastered a section of trail. “My suspension is finally dialled” or “I’ve got that rock garden properly dialled now.”

    Direct Mount – A way of attaching components (usually brakes or derailleurs) directly to the frame without an adapter. Stiffer and cleaner looking than older systems.

    Doubletrack – Wide trail, often an old road or fire road. Usually connects singletrack sections. Not as exciting to ride but gets you where you need to go.

    Down Country – Newer category between XC and trail bikes. Faster and lighter than trail bikes, more capable than XC bikes on descents. The Goldilocks bike for fast riding.

    Downslope – The landing surface of a jump. Usually angled downward so you’re not landing on flat ground, which is about as pleasant as it sounds.

    Dropper Post – A seatpost you can raise and lower on the fly with a handlebar remote. Absolute game-changer for descending. If you don’t have one, get one. Seriously.

    Dual Crown Fork – Suspension fork with two crowns clamping the stanchions, found on downhill bikes. Stiffer and stronger than single-crown forks but heavier and with limited steering range.


    E

    Enduro – Both a type of bike (150-180mm travel, designed for descending) and a racing format where you pedal between timed downhill stages. Also used more generally to mean aggressive, technical riding.

    EMTB – Electric mountain bike. Has a motor that assists your pedalling. Lets you ride further, faster, or with less fitness. Controversial with some traditionalists, brilliant fun according to most people who actually ride them.


    F

    Flat Pedals – Standard pedals without clips or cleats. Modern flat pedals have pins that grip your shoe soles. Excellent for learning, preferred by many experienced riders for technical terrain or jumping.

    Flow – That magical feeling when you’re riding smoothly, carrying speed, and everything just clicks. Also describes trails that have a nice rhythm to them. Everyone wants more flow.

    Fork – Your front suspension. Absolutely crucial component on a mountain bike. Don’t cheap out here if you can possibly help it.


    G

    Gap Jump – A jump with a gap between takeoff and landing. You need to clear the gap or you’ll have a bad time. More commitment required than tabletops.

    Geometry – The angles and measurements that define how a bike handles. Head angle, seat angle, reach, stack, wheelbase. Modern geometry has evolved dramatically, making bikes longer, lower, and slacker.

    Gnarly – Difficult, technical, rough terrain. “That rock garden was properly gnarly.”

    Granny Ring/Granny Gear – The easiest (biggest rear cog) gear, traditionally called this because even your granny could pedal up hills in it. Less commonly used now that most bikes run single chainrings.

    Gravel Bike – Drop bar bike designed for unpaved roads and light trails. Popular for bikepacking and mixed-surface riding. Not a mountain bike, but you’ll hear about them.

    Grippy – When tyres or trail surface provide good traction. “The trail was wet but still grippy.”

    Groupset – The collection of drivetrain components (shifters, derailleurs, cassette, chain, cranks). Usually from the same manufacturer and tier. Shimano Deore or SRAM GX are common groupsets.


    H

    Hardtail – Mountain bike with front suspension but no rear suspension. Lighter, simpler, cheaper, more efficient, and more demanding than full-suspension bikes. Brilliant for skill development.

    Head Angle/Head Tube Angle – The angle of your fork/head tube. Steeper (70-71°) makes bikes turn quickly, better for climbing. Slacker (65-68°) makes bikes more stable at speed and confident on descents. Modern bikes have gotten progressively slacker.

    Huck – To jump or drop off something, often with more commitment than skill. “I’m going to huck this drop.”


    J

    Jump Line – A trail or section made up entirely of jumps in sequence. Flow, rhythm, and commitment required.


    K

    Kicker – A small or large jump with a steep take-off. Kickers usually involve hang-time in the air. See also booter.

    Kit – Your riding outfit. More commonly used in road cycling, but mountain bikers use it too.

    Klunker – Old, outdated mountain bike. The original mountain bikes from the 1970s were klunkers.

    KOM – King of the Mountain. Strava term for fastest male time on a segment. See also QOM.


    L

    Ladder Bridge – Elevated trail feature, usually wooden, that gains or loses elevation. Can be sketch-inducing.

    LBS – Local Bike Shop. Support them when you can.

    Lid – Slang for a helmet. See also half-lid, full-face, and breakaway.

    Lift-Served – Bike park trails accessed via chairlift or gondola. Heaven for descenders, questionable value for fitness enthusiasts.

    Line – Your chosen path through a section of trail. Good riders read the terrain and pick efficient lines. Poor riders (all of us starting out) just aim for the middle and hope.

    Linkage – The mechanical bits connecting the rear shock to the frame on a full-suspension bike. Different designs affect how the suspension behaves.

    Lip – The edge of a jump’s takeoff or landing. “Don’t clip the lip on that jump.”

    Loam – Soft, organic, grippy dirt. The absolute dream surface for mountain biking. Pacific Northwest and parts of the UK are blessed with loam. The rest of us are jealous.

    Lockout – Suspension feature that firms up the fork or shock, reducing suspension movement. Useful for climbing smooth fire roads. Less useful than marketing would have you believe.


    M

    Manual – Riding on just the rear wheel without pedalling (unlike a wheelie). A useful skill for getting over obstacles and maintaining speed through rough sections.

    Modulation – How controllable your brakes are. Good modulation means you can precisely control braking force. Poor modulation is on/off with nothing in between.

    Mullet – Bike with 29″ front wheel and 27.5″ rear wheel. Gives you the rollover of 29″ up front with the playfulness of 27.5″ out back. Business in the front, party in the rear, as the saying goes.


    N

    Noodle – When your arms or legs go weak and wobbly, usually from fatigue or fear. “My arms were completely noodled by the end of that descent.”


    O

    OTB (Over The Bars) – Going over the handlebars, usually due to braking too hard or hitting something unexpected. Rarely ends well. “I went proper OTB on that root.”

    Opposite Lock – Steering into a slide to control it, like drifting a car. Looks brilliant, saves crashes, takes practice.


    P

    Pepino – Spanish for cucumber. Randomly also used to denote a very nice bike, in some circles.

    Pinch Flat/Snake Bite – When you compress your tyre so hard it pinches the inner tube against the rim, creating two small holes (the snake bite). A good reason to run tubeless.

    Ply/TPI – Threads per inch in tyre construction. Higher TPI generally means lighter, more supple tyres. Lower TPI means tougher, more durable tyres.

    Preload – Initial tension in a spring. More relevant to coil shocks than air shocks. Not the same as air pressure or sag.

    Pump – Pushing down and pulling up on the bike to generate speed without pedalling. Absolutely fundamental skill for efficient riding. Also, the thing you inflate tyres with, but context makes that obvious.

    Pump Track – A looped track made of rollers and berms designed to be ridden without pedalling. Brilliant for learning to pump and corner. Addictively fun.


    Q

    Quiver – Your collection of bikes. “What’s in your quiver?” means “What bikes do you own?”


    R

    Ratchet – Clicking your cranks backwards to reposition your pedals for the next obstacle without moving forward. Essential skill for technical terrain.

    Reach – Horizontal distance from the bottom bracket to the head tube. One of the most important geometry measurements. Longer reach = more stable, more stretched out. Modern bikes have much longer reach than older bikes.

    Rebound (Damping) – Controls how fast your suspension extends after compressing. Too fast and you’ll bounce. Too slow and it packs down on repeated hits. Getting rebound right is crucial.

    Rigid – A bike or fork with no suspension at all. Some riders love the simplicity and connection to the trail. Most riders think they’re mad.

    Roost – Kicking up dirt, rocks, or mud as you accelerate or corner hard. Looks dramatic, makes your mates behind you less happy.

    Rowdy – Aggressive, rough, challenging riding or terrain. “That descent was properly rowdy.”


    S

    Sag – How much your suspension compresses under your weight when sitting on the bike. Usually set at 25-30% of total travel. Getting sag right is the foundation of good suspension setup.

    Scrub – Pushing the bike down and forward through jumps to reduce airtime and maintain speed. Looks fast, is fast, takes skill.

    Seat Angle/Seat Tube Angle – The angle of your seat tube. Steeper angles (74-76°) put you over the pedals for better climbing position. Modern bikes run much steeper seat angles than older bikes.

    Send It – To commit fully to a feature or section. “Are you going to send that gap jump?” Usually said right before someone does something they might regret.

    Session – Repeatedly riding the same feature or section to dial it in or just because it’s fun. “Let’s session these jumps for a bit.”

    Shred – To ride aggressively and skilfully. “That descent was proper shredding.” Also used as a noun: “Let’s go for a shred.”

    Single Track – Trail only wide enough for one bike. As opposed to double track (fire roads, etc). Usually the most fun type of trail.

    Skid – Locking up your rear wheel and sliding. Looks cool in films, ruins trails and wastes momentum in reality.

    Slack – Shallow angle, particularly referring to head angle. Slacker = more stable, more confidence-inspiring on descents. “That bike is super slack at 64°.”

    Snake Bite – See Pinch Flat. Called this because the two puncture holes look like a snake bite.

    Squish – Suspension travel. “How much squish does your bike have?” Deeply unscientific but everyone knows what you mean.

    Stack – Vertical distance from the bottom bracket to the top of the head tube. Higher stack = more upright position.

    Stanchions – The upper tubes of your fork that slide into the lowers. Keep them clean and scratch-free for long fork life.

    Steep – Sharp angle. Can refer to geometry (steep head angle) or terrain (steep descent). Context is everything.

    Stoked – Excited, happy, hyped. “I’m so stoked for this ride.”

    Super Boost – Even wider rear hub standard (157mm) found on some enduro and downhill bikes. Provides maximum stiffness but limits wheel compatibility.

    Switchback – A tight corner that reverses direction, usually on a climb. Proper technique required to avoid dabbing or walking.


    T

    Tabletop – A jump with a flat top connecting the takeoff and landing. Safer than gap jumps because you can land on the flat bit if you come up short.

    Taco – When a wheel gets bent so badly it looks like a taco. Usually terminal for the wheel. “I totally tacoed my rear wheel on that rock.”

    Tech/Technical – Difficult terrain requiring precise bike handling and good line choice. Rocks, roots, tight turns, drops. “That trail is properly technical.”

    Tokens – Volume spacers for air suspension. Add them to make suspension more progressive (ramps up more at the end of travel). Remove them for more linear feel.

    Trail – Both a type of bike (120-150mm travel, designed for all-around fun) and, well, an actual trail. Context sorts it out.

    Travel – Amount of suspension movement, measured in millimetres. More travel = more capability on rough terrain, but also more weight and potentially less efficiency.

    Tubeless – Running tyres without inner tubes, using sealant instead. Fewer punctures, better traction, lower pressures. Minor faff to set up but absolutely worth it.


    W

    Wash Out – When your tyres lose grip in a corner and slide out. Usually followed by hitting the ground.

    Wheelbase – Distance between your front and rear axles. Longer wheelbase = more stable, less nimble. Shorter wheelbase = more playful, twitchier at speed.

    Wheelie – Riding on the rear wheel whilst pedalling (unlike a manual). Useful for getting up steps or over obstacles. Also just fun.

    Whip – Turning the bike sideways in the air. Looks brilliant, serves no practical purpose, everyone wants to learn them.


    X

    XC (Cross Country) – The lightest, fastest type of mountain biking. Focused on climbing and covering distance efficiently. Also a racing discipline. Think of it as the road cycling of mountain biking.


    Y

    Yard Sale – A spectacular crash where you and your bike (and sometimes all your gear) end up scattered across the trail like a yard sale. Entertaining for spectators, less so for the rider.


    The Bottom Line

    Mountain bike slang isn’t meant to be exclusive or confusing. It’s just shorthand that evolved so riders could communicate efficiently about technical topics. Now you’re in on the secret.

    Did we miss something? Mountain biking is always evolving, and so is the language around it. If there’s a term you’ve heard that’s not on this list, drop it in the comments below and we’ll add it. Help us make this the most comprehensive MTB slang dictionary out there.

  • What is an Aggressive Hardtail?

    You’ve probably seen them at the bike park or trail centre. Hardtails that look like they’ve been designed by someone who thinks regular trail bikes are far too sensible. Long travel forks, slack head angles, burly frames, and an attitude that says “I can take whatever you throw at me.”

    Welcome to the world of aggressive hardtails. They’re brilliant, slightly mad, and not for everyone. Let’s dig into what makes them special.

    The Basic Definition

    An aggressive hardtail is essentially a hardtail mountain bike that’s been designed to handle terrain you’d normally reserve for full-suspension bikes. We’re talking 140-160mm of front suspension travel, slack geometry (think 65-67° head angles), and construction that’s built to take a proper beating.

    They sit somewhere between regular trail hardtails and full-suspension enduro bikes. Too burly for your average XC loop, too much fun to ignore if you like rough, technical trails.

    Why Would Anyone Want One?

    Fair question. After all, if you’re riding gnarly terrain, wouldn’t full suspension make more sense?

    The Case For Aggressive Hardtails:

    They’re Engaging – Every rock, root, and drop demands your attention. You can’t just point and shoot like you might on a full-suspension bike. This makes them brilliant for improving your skills and keeping rides interesting.

    Proper Value – A £2,000 aggressive hardtail will have components that would cost £3,500-4,000 on a full-suspension bike. You’re getting high-end forks, decent drivetrains, and quality wheels without the suspension tax.

    Low Maintenance – No rear shock to service, no linkage bearings to replace, no suspension tune to obsess over. Just clean it, lube the chain, ride it hard.

    They Climb Surprisingly Well – Despite the slack geometry and long travel, the rigid rear end means all your power goes to the rear wheel. They’re not XC race bikes, but they’ll get you to the top without too much suffering.

    Character – There’s something wonderfully pure about riding a hardtail down terrain it has no business being on. It’s engaging in a way that modern full-suspension bikes sometimes aren’t.

    What Makes Them “Aggressive”?

    Several key features separate aggressive hardtails from their more civilised trail bike cousins:

    Long Travel Forks

    We’re talking 140-160mm here, sometimes even 170mm on the really rowdy ones. Compare that to 100-120mm on a regular trail hardtail. This extra squish helps absorb the big hits on rough descents.

    The trade-off? They’re heavier and bob a bit more when climbing. But if you’re buying an aggressive hardtail, you’ve already decided descending matters more than XC race times.

    Slack Head Angles

    While trail hardtails typically run 67-69° head angles, aggressive hardtails go slacker. Think 65-67°, sometimes even less. This pushes the front wheel further out, creating stability at speed and confidence on steep terrain.

    The downside is they can feel a bit ponderous in tight switchbacks. Horses for courses.

    Longer Reach

    Modern aggressive hardtails have grown in reach. Medium frames often measure 450-470mm, with larges pushing 480-500mm. This stretched-out position provides stability on descents and room to move around on technical terrain.

    If you’re used to shorter, more compact geometry, they’ll feel quite different at first.

    Lower Bottom Brackets

    A lower centre of gravity aids stability, so aggressive hardtails often drop the bottom bracket compared to XC bikes. This helps confidence on rough terrain, though it does mean you’ll clip pedals on roots and rocks if you’re not paying attention.

    Burly Construction

    These bikes need to handle impacts that would make a regular trail hardtail weep. Thicker tubing, reinforced areas around the head tube and dropouts, and generally overbuilt frames are the norm.

    This adds weight (most sit around 13-15kg complete), but that’s the price of durability.

    Wheel Size Choices

    Whilst 29″ wheels dominate modern trail bikes, aggressive hardtails often run 27.5″ wheels. The smaller diameter provides better manoeuvrability in technical terrain and makes it easier to get the bike airborne.

    That said, plenty of aggressive 29ers exist. Some riders prefer the rollover and traction benefits even on rowdy hardtails.

    Popular Aggressive Hardtail Models

    Budget-Friendly Options (£1,000-£1,800)

    Vitus Sentier VR (£1,400-£1,600) – Cracking value with 140mm fork, slack geometry, and dropper post. A brilliant entry point to aggressive hardtails without breaking the bank.

    Nukeproof Scout 275 Comp (£1,500) – 140mm travel, proper geometry, Nukeproof’s reputation for building burly bikes. Hard to fault at this price.

    Ragley Marley (£1,400-£1,700) – British brand with a cult following. Playful geometry, 140mm travel, and bags of character.

    Mid-Range Mayhem (£1,800-£2,500)

    Cotic BFe (£2,000-£2,500) – Steel frame with brilliant ride quality. Available in different builds, all with 150mm forks and slack geometry that’s been refined over years.

    Ragley Big Wig (£2,000-£2,300) – 160mm travel, 27.5″ wheels, designed for proper rough stuff. Playful geometry that rewards aggressive riding.

    Nukeproof Scout 275 Expert (£2,200) – Step up from the Comp with better fork, dropper, and components. Excellent package.

    Premium Punishment (£2,500+)

    Pipedream Moxie (£2,500-£3,500) – Boutique British brand. Steel or titanium frame options, 150mm travel, geometry that’s been honed on Yorkshire trails.

    Cotic SolarisMAX (£3,000+) – The rowdier big brother of the BFe. 160mm travel, designed for bike parks and gnarly natural terrain.

    Chromag Wideangle (£2,800-£3,500) – Canadian-built, proper burly, cult following. Available in steel or aluminium.

    Who Should Buy an Aggressive Hardtail?

    These bikes aren’t for everyone. Here’s who they suit best:

    Experienced Riders – You need decent bike handling skills. An aggressive hardtail will expose poor technique faster than you can say “medical insurance.”

    Technical Trail Enthusiasts – If your local trails are rocky, rooty, and steep, these bikes excel. Smooth flow trails? Less so.

    Bike Park Regulars – Brilliant for blue and red trails at bike parks. You can session jumps, ride rough terrain, and have a blast without the weight and complexity of full suspension.

    Skill Builders – Want to become a better rider? An aggressive hardtail will teach you line choice, body positioning, and bike control faster than any full-suspension bike.

    Budget-Conscious Shredders – Get high-end components and capable geometry for significantly less than full suspension.

    People Who Like Character – If you want a bike that feels alive and demands engagement, these deliver in spades.

    Who Should Probably Look Elsewhere?

    Beginners – Start with a regular trail hardtail or full suspension. These bikes amplify mistakes.

    Comfort Seekers – Your back and arms will know you’ve been riding. If comfort trumps engagement, get full suspension.

    Pure XC Riders – These bikes climb fine but aren’t designed for racing. Get a proper XC hardtail instead.

    Mostly Smooth Trails – If your local riding is predominantly flow trails and gentle descents, you’re carrying extra weight and travel for no benefit.

    Aggressive Hardtail vs Full Suspension

    The eternal question. Here’s the honest comparison:

    When the Hardtail Wins

    • Value: Better components for your money
    • Simplicity: Less maintenance and fewer things to break
    • Engagement: More involving, teaches better skills
    • Climbing: More efficient power transfer
    • Weight: Lighter for similar component spec

    When Full Suspension Wins

    • Big Hits: Rear suspension absorbs impacts your body would otherwise take
    • Traction: Keeps the rear wheel planted on rough climbs and descents
    • Speed on Rough Terrain: Faster through technical sections
    • Comfort: Less physical beating over long rides
    • Confidence: More forgiving of mistakes

    The verdict? Neither is objectively better. It depends on your riding style, local terrain, and what you value in a bike. Some riders (myself included) own both because they excel at different things.

    Key Considerations Before Buying

    Your Local Terrain

    Be honest about where you actually ride. If your trails are mostly smooth with occasional rough sections, an aggressive hardtail might be overkill. But if you’re surrounded by rocks, roots, and steep technical trails, they make perfect sense.

    Your Skill Level

    These bikes reward good technique and punish poor form. If you’re still learning basics like body position and line choice, a more forgiving bike might serve you better initially.

    Intended Use

    Bike parks: Brilliant choice for blue and red trails

    Natural technical trails: Where they really shine

    XC loops: They’ll do it but won’t be quickest

    Bikepacking: Some models (particularly steel frames) work well

    Commuting: Massively overkill but I won’t judge

    Frame Material

    Aluminium – Most common, good value, stiff, durable. The default choice.

    Steel – Smoother ride, more compliance, easier to repair, heavier. Popular with riders who value feel over outright performance.

    Titanium – Best ride quality, light, indestructible, expensive. Boutique option for those with deep pockets.

    Component Priorities

    With aggressive hardtails, spend your money where it matters:

    Fork is Critical – This is your only suspension. Don’t cheap out. Aim for at least RockShox Yari, Fox 36, or equivalent. The fork often represents 25-30% of the bike’s value.

    Brakes Matter – You’ll be going fast down rough stuff. Get 4-piston hydraulic brakes with 180-200mm rotors up front.

    Dropper Post Essential – Non-negotiable on these bikes. You need to get your weight back on descents.

    Tyres Make a Difference – Aggressive tread patterns and strong casings. Budget £60-80 per tyre for quality rubber.

    Drivetrain Can Be Mid-Range – Shimano Deore or SRAM NX work fine. Save money here to spend on fork and brakes.

    Common Questions

    Q: Can I use it for trail centres and normal riding? A: Absolutely. They’re versatile bikes. You’ll just be carrying a bit more weight and travel than strictly necessary on easier trails.

    Q: How much harder is it than full suspension on rough trails? A: You’ll be 5-10% slower on really rough descents and you’ll feel more impacts. But many riders find the engagement worth it.

    Q: What about jumps and drops? A: They handle jumps brilliantly. Drops are fine if your technique is sound, though full suspension is more forgiving of rough landings.

    Q: Will I break it? A: These bikes are built tough. Ride within your limits, maintain it properly, and it’ll handle more than you think.

    Q: Should I get 27.5″ or 29″ wheels? A: 27.5″ for maximum playfulness and manoeuvrability. 29″ for better rollover and traction. Both work well. Test ride if possible.

    Q: Can I add a rear shock later? A: No. Buy full suspension if you want full suspension. Hardtail frames can’t be converted.

    Setting Up Your Aggressive Hardtail

    Tyre Pressure

    Run lower pressures than on a trail hardtail since you don’t have rear suspension. Start around 23-25 PSI rear, 20-23 PSI front (adjust for rider weight), and fine-tune from there. Too high and you’ll be bouncing everywhere. Too low and you’ll pinch flat.

    Tubeless is basically mandatory.

    Saddle Height

    When descending, you’ll be dropping the saddle significantly. Make sure your dropper has enough drop. For aggressive terrain, 150-170mm is ideal depending on your height.

    Handlebar Width

    Wider is generally better for control on rough terrain. 760-800mm is common, though personal preference varies.

    Suspension Setup

    Take time to properly set up your fork. Get sag right (25-30% for aggressive riding), adjust rebound, and use volume spacers if needed. A poorly set up fork makes these bikes harsh. A properly tuned fork transforms them.

    The Bottom Line

    Aggressive hardtails occupy a unique space in mountain biking. They’re not the fastest, not the most comfortable, not the most forgiving. But they’re engaging, capable, affordable, and brilliant fun on the right terrain.

    They demand skill and reward commitment. They’ll teach you to be a better rider whilst putting a massive grin on your face. And they’ll do it without the complexity and cost of full suspension.

    Are they for everyone? Definitely not. Are they brilliant for riders who want an involving, capable hardtail that can handle proper rough stuff? Absolutely.

    If you’re experienced enough to handle one, ride terrain that suits one, and value engagement over pure comfort, an aggressive hardtail might be exactly what you’re looking for.

    Just don’t blame me when you start eyeing up gnarly descents you’d previously walked.

    See you out there.

  • Hardtail Mountain Bikes: Your Complete Buying Guide

    So you’re thinking about getting a hardtail mountain bike. Smart move! Whether you’re just starting out or looking to upgrade from that bike you’ve been thrashing about on for the past few years, you’ve come to the right place. This guide will walk you through everything you need to know without the sales pitch or unnecessary jargon.

    What are Hardtail Mountain Bikes?

    Right, let’s start with the basics. A hardtail mountain bilke has suspension at the front but nothing at the back. Just a solid rear triangle connecting the seat tube to the rear wheel. No shock, no linkage, no fuss. Simple as.

    Why Choose a Hardtail MTB Over Full Suspension?

    Advantages of Hardtails

    They’re Cheaper – Without all that rear suspension gubbins, hardtails cost considerably less than full-suspension bikes. Your money goes further on better components, or you can pocket the difference. Either way, you’re winning.

    Less Faff – Fewer moving parts means less that can go wrong. No rear shock to service, no linkage bearings to replace, no suspension to endlessly fiddle with. Perfect if you’d rather be riding than playing mechanic every other weekend.

    Brilliant Climbers – All your pedalling power goes straight to the rear wheel. No energy lost to suspension bob. Hardtails climb like they mean business and feel properly responsive when you put the power down.

    Lighter – Without the rear shock and all its mates, hardtails typically weigh 1-2 kilograms less than comparable full-suspension bikes. Your legs will thank you on the climbs.

    They’ll Make You Better – Can’t rely on rear suspension to bail you out, so you’ll actually learn to pick proper lines and position yourself correctly. It’s like learning to drive in a manual. Slightly harder at first, but you’ll be a better rider for it.

    When Full Suspension Makes More Sense

    Hardtails aren’t the answer to everything. If you’re mainly riding gnarly downhill trails, hitting bike parks, or tackling proper enduro terrain, you’ll probably want that rear shock. Sometimes comfort matters more than efficiency, and that’s perfectly fine.

    Types of Hardtail Mountain Bikes

    Cross-Country (XC) Hardtails

    Best for: Racing, fitness rides, pretending you’re in the Olympics

    These are the whippets of the mountain bike world. Built for speed above all else. You’ll find 100mm or less of front travel, lightweight frames (often carbon), steep geometry for quick handling, and 29-inch wheels. They’re not exactly forgiving, but they’re properly quick.

    Popular models: Trek Procaliber, Specialized Epic Hardtail, Canyon Exceed

    Trail Hardtails

    Best for: Trail centres, everyday riding, beginners, not taking yourself too seriously

    The Goldilocks zone. Trail hardtails balance capability with efficiency, offering 120-130mm of front travel, relaxed geometry, and a comfortable riding position. They won’t win you any XC races, but they’ll handle most trails with a smile.

    Popular models: Trek Roscoe, Specialized Fuse, Giant Fathom, Marin San Quentin

    Aggressive Hardtails

    Best for: Rough terrain, bike parks, riders who think trail bikes are too sensible

    The rowdy end of the hardtail spectrum. These bikes blur the line between trail and enduro hardtails, packing 140-160mm of front travel, slack geometry (65-67° head angles), and burly construction. They’ll take a proper beating on rough descents whilst still being pedal-able enough to get you back to the top.

    Think of them as the hardtail equivalent of a trail bike that’s been hitting the gym. Longer reach, lower bottom brackets, and often 27.5″ wheels for extra manoeuvrability in rough stuff. Not the fastest uphill, but absolutely brilliant when pointed down something technical.

    Popular models: Nukeproof Scout, Ragley Big Wig, Cotic BFe, Pipedream Moxie

    Dirt Jump/Pump Track Hardtails

    Best for: Jumping things, looking cool, questionable life choices

    Built like tanks for aerial activities. Short travel or rigid forks, compact frames, small wheels, and bomb-proof construction. Not for the Sunday countryside pootle, unless your idea of countryside includes landing ramps.

    Popular models: Trek Ticket S, Specialized P.Series, Canyon Stitched

    Key Features to Consider

    Frame Material

    Aluminium – The workhorse. Offers brilliant strength-to-weight ratio without bankrupting you. Modern aluminium frames are genuinely excellent, and they’re more durable than carbon when you inevitably stack it into a tree.

    Carbon Fibre – Lighter and smoother riding than aluminium, but you’ll pay handsomely for the privilege. Great if you’ve got the budget, but don’t lose sleep over it if you haven’t.

    Steel – Old school cool. Heavier than aluminium but rides beautifully and lasts forever. Popular with the bikepacking crowd and those who appreciate a more relaxed vibe.

    Titanium – For when you’ve won the lottery but still want to go mountain biking. Lightweight, indestructible, rides like a dream, costs like a small car.

    Wheel Size

    29-inch (29er) – The current favourite. Rolls over stuff better, holds speed nicely, provides loads of traction. Can feel a bit unwieldy if you’re shorter or riding tight, twisty trails, but most riders get on with them brilliantly.

    27.5-inch (650b) – Quicker handling, more playful feel, better for shorter riders. Still a solid choice, particularly on aggressive trail bikes where nimbleness matters.

    26-inch – Basically extinct except on dirt jump bikes. If anyone tries to sell you a 26-inch trail bike, just walk away.

    Plus Size (27.5+ or 29+) – Fat tyres on normal rims. Extra grip and comfort, acts like poor man’s rear suspension. Brilliant for beginners or rough terrain, though you’ll sacrifice some speed.

    Suspension Fork

    Your fork matters. A lot. It’s literally your only suspension, so don’t cheap out here if you can help it.

    Travel Amount:

    • 80-100mm: XC racing, smooth trails, suffering efficiently
    • 100-120mm: The sweet spot for most trail riding
    • 130-140mm: Aggressive trail riding, rougher stuff
    • 150mm+: Dirt jumping, trying to break yourself

    Fork Quality Tiers:

    • Entry-level (£100-300): Heavy, basic damping, will do the job but won’t love you back. RockShox XC28, SR Suntour XCR
    • Mid-range (£300-600): Air springs, adjustable rebound, actually quite good. RockShox Recon, Fox 32, Marzocchi Z2
    • High-end (£600-1,500+): Proper nice. Advanced damping, stiffness where it matters, light enough to notice. RockShox Pike, Fox 36, Fox 34

    Drivetrain

    1x (Single Chainring): Modern standard. One ring up front, 10-12 speeds out back. Simple, reliable, plenty of range for most riding. No front derailleur to faff about with or get clogged with mud.

    2x or 3x (Multiple Chainrings): Old school. More gears total, but also more complexity and things to go wrong. Rarely seen on new bikes, and there’s a reason for that.

    Popular Groupsets (Budget to Premium):

    • Shimano: Deore → SLX → XT → XTR (all perfectly decent)
    • SRAM: NX → GX → X01 → XX1 (equally solid)

    Brakes

    Mechanical Disc – Cable-operated. Fine for gentle riding, found on budget bikes. Do the job but nothing special.

    Hydraulic Disc – Proper stopping power, better control, less hand fatigue. Standard on anything over £800 and what you actually want for trail riding.

    Rotor Size:

    • 160mm front/rear: XC racing, lighter riders
    • 180mm front/160mm rear: Most trail riding
    • 180mm or 200mm front: Bigger riders, steep terrain, like actually being able to stop

    Geometry Considerations

    Head Tube Angle – Steeper (70-71°) for XC speed, slacker (67-69°) for descending confidence. Slack is rad, as the kids used to say.

    Seat Tube Angle – Steeper (74-76°) puts you over the pedals for better climbing. Modern bikes have got this sorted.

    Reach – How stretched out you’ll be. Longer = stable but less nimble. Shorter = playful but can feel cramped on steep descents.

    Chainstay Length – Short (425-435mm) = playful and fun. Long (440mm+) = stable and grippy. Pick your poison.

    Dropper Post Compatibility

    A dropper post (where you can lower your saddle on the fly) is genuinely brilliant. Make sure your frame can fit one, even if you’re not buying one immediately. Future you will appreciate it.

    Hardtail Mountain Bike Price Ranges

    Entry-Level: £500-£1,000

    What you’re getting: Aluminium frame, basic fork, mechanical brakes, heavy but functional kit. It’ll get you started, but components won’t last forever and it’ll weigh more than your expectations.

    Best for: Seeing if you actually like mountain biking before spending serious money.

    Recommended bikes: Giant ATX, Specialized Rockhopper, Trek Marlin series

    Mid-Range: £1,000-£2,000

    What you’re getting: Proper aluminium frame with modern geometry, decent air fork, hydraulic brakes, 1x drivetrain that actually works, probably dropper-ready. This is where the real value lives.

    Best for: Regular trail riders who’ve decided this mountain biking thing is actually quite fun.

    Sweet spot alert: Honestly, this range offers the best bang for your buck.

    Recommended bikes: Trek Roscoe, Specialized Fuse, Canyon Stoic, Giant Fathom, Marin Bobcat Trail

    High-End: £2,000-£4,000

    What you’re getting: Premium frame (aluminium or carbon), excellent fork, 1×12 drivetrain, 4-piston brakes, dropper post included, lighter wheels. Properly good kit that’ll last.

    Best for: Serious riders, competitive types, people who’ve given up other expensive hobbies to afford this one.

    Recommended bikes: Trek Procaliber 9.7, Specialized Epic Hardtail, Canyon Exceed, Santa Cruz Chameleon

    Premium/Race: £4,000+

    What you’re getting: Carbon everything, top-tier components, sub-11.5kg complete bikes, bragging rights at the trailhead.

    Best for: Racers, weight weenies, people with more money than sense. Meant affectionately, of course.

    Recommended bikes: Specialized S-Works Epic Hardtail, Trek Procaliber 9.9, Canyon Exceed CFR

    Sizing Your Hardtail

    Get this wrong and you’ll hate riding. Get it right and everything just works.

    General Height-to-Size Chart

    • Extra Small (XS): 147cm – 157cm
    • Small (S): 157cm – 168cm
    • Medium (M): 168cm – 178cm
    • Large (L): 178cm – 185cm
    • Extra Large (XL): 185cm – 193cm
    • XXL: 193cm+

    Modern Sizing by Reach

    Brands are increasingly using reach measurements rather than traditional sizes. Here’s the rough guide:

    • XS: 380-400mm reach
    • S: 400-420mm reach
    • M: 420-450mm reach
    • L: 450-480mm reach
    • XL: 480-510mm reach

    Between Sizes?

    • Size down if you want manoeuvrability and playfulness, or ride technical terrain
    • Size up if you prioritise stability and ride fast or rough terrain
    • Test ride both if you can. Twenty minutes on a bike tells you more than any chart.

    Standover Height

    Make sure you’ve got at least 5-8cm of clearance when standing over the top tube. Your future self (and possibly your future children) will thank you.

    Essential Accessories for Your Hardtail

    Must-Have Items

    Helmet – Non-negotiable. Budget £50-100 minimum for something that’ll actually protect your brain.

    Pedals – Most bikes come with rubbish pedals or none at all. Upgrade to proper flat pedals with pins (£40-100) or clipless if that’s your thing (£50-200 plus shoes).

    Multi-tool – For when things inevitably come loose (£20-40)

    Spare Tube and Pump – Beats walking home (£20-30)

    Water Bottle Cage – Staying hydrated is important, apparently (£10-20)

    Recommended Upgrades

    Dropper Post – Single best upgrade you can make. Changes everything about descending (£150-400)

    Tubeless Conversion – Fewer punctures, better grip, lower pressures. Most modern wheels are ready for it (£50-80 for setup)

    Decent Tyres – Tyres make a massive difference. Upgrade from whatever rubbish came stock (£50-80 per tyre)

    Comfortable Saddle – If the stock saddle’s killing you after a few rides, don’t suffer in silence (£30-150)

    Hardtail Maintenance Basics

    Hardtails need less faff than full-suspension bikes, but you can’t completely ignore them.

    After Every Ride

    Quick wipe down, check tyre pressure, make sure nothing’s fallen off. Five minutes, maximum.

    Monthly (or every 10-20 hours)

    Clean and lube the chain, check brake pads, look for anything obviously wrong. Half an hour of basic maintenance saves expensive repairs later.

    Every 50-100 Hours

    Proper clean, replace chain if worn (use a chain checker tool, they’re cheap), bleed brakes if they’re feeling spongy, basic fork service.

    Annually

    Full fork service, replace cables if needed, check all bearings, replace anything that’s properly worn. Take it to a shop if you’re not mechanically inclined. It’s worth it.

    Where to Buy Your Hardtail

    Local Bike Shops

    Pros: Advice, test rides, professional setup, someone to moan to when things go wrong, supporting local business

    Cons: Higher prices (10-20% more), limited stock, might push brands they stock

    Best for: First-time buyers, people who value service, those who like talking about bikes almost as much as riding them

    Direct-to-Consumer Brands

    Brands: Canyon, YT Industries, Commencal, Polygon

    Pros: Serious money savings (20-40% less), excellent specs for the price, delivered to your door

    Cons: No test rides (though returns are usually fine), you’ll need to finish assembly, no local backup

    Best for: Experienced riders, confident home mechanics, bargain hunters

    Used Market

    Where to look: Facebook Marketplace, Gumtree, Pinkbike classifieds, local bike swaps

    Pros: Save 30-60%, sometimes find absolute steals, good way to try mountain biking affordably

    Cons: Might be knackered, no warranty, could need immediate work, finding the right size is tricky

    Best for: Those on tight budgets, experienced riders who know what to look for

    Buying Used Tips

    Check frame for cracks (especially near welds), inspect fork stanchions for scratches, test everything that moves, check for play in bearings, look for signs of crashes. Bring someone who knows bikes if you don’t.

    Frequently Asked Questions

    Q: Can I use a hardtail for bike park or downhill riding? A: You can, and it’ll make you a better rider, but it won’t be as forgiving as full suspension. Start small, work your way up, maybe invest in good health insurance.

    Q: Will a hardtail hurt my back on rough trails? A: It can do if you ride like a plank. Stay loose, use your legs as suspension, don’t death-grip the bars. Plus-size tyres and a decent fork help too.

    Q: How much suspension travel do I need? A: For most trail riding, 120mm is the sweet spot. More suits aggressive riding but you’ll pay for it on climbs. Less is fine for XC and smooth trails.

    Q: Should I get 27.5″ or 29″ wheels? A: 29″ for most riders. They just work better. Go 27.5″ if you’re shorter (under 168cm), want maximum playfulness, or ride proper tight stuff.

    Q: Is a dropper post necessary? A: Necessary? No. Absolutely brilliant and you’ll wonder how you lived without one? Yes. Skip it for pure XC, get one for everything else.

    Q: Can I add a rear shock to my hardtail later? A: No. Frames don’t work like that. If you want full suspension, buy full suspension.

    Q: What’s better, aluminium or carbon? A: Modern aluminium is excellent and cheaper. Carbon’s lighter and smoother but costs more and breaks more dramatically. For most riders, aluminium’s the sensible choice.

    Q: How often should I replace my chain? A: Check it every 320-480km with a chain checker. Replace at 0.5% wear (sooner for 11/12-speed). Cheap chains are cheaper than expensive cassettes.

    Ready to Buy?

    Right, you’re sorted. Armed with all this information, you can make a proper informed decision rather than just buying whatever the bike shop has in your size.

    Remember:

    1. Test ride if possible – Fifteen minutes on a bike beats hours of spec sheet obsessing
    2. Get the size right – Fit matters more than fancy bits
    3. Budget for extras – Helmet, pedals, tools add £200-400
    4. Think ahead – Buy slightly more bike than you need now
    5. Don’t overthink it – The best bike is the one you’ll actually ride, not the one gathering dust whilst you wait for the perfect conditions

    Mountain biking’s a brilliant sport with a welcoming community. Get out there, find some local trails, join group rides, ask questions. Most importantly, have fun. That’s rather the point.

    See you out there!

  • Cross Country Full Suspension Mountain Bikes: Your Complete Buying Guide

    So you’ve caught the XC bug – that intoxicating blend of speed, efficiency, and trail-shredding capability that has you dreaming about your next ride. Perhaps you’ve been eyeing up your mate’s lightweight race machine, or you’ve finally decided it’s time to upgrade from your trusty hardtail. Whatever brought you here, you’re in the right place. This guide will help you understand exactly what to look for in cross country full suspension mountain bikes and, more importantly, help you find the perfect machine to unlock your riding potential.

    By the end, you’ll know precisely which features matter, which compromises are worth making, and where the best value lies. Let’s find your dream bike.

    What Makes a Great XC Bike?

    Understanding the fundamentals of XC bike design isn’t about memorising technical jargon – it’s about knowing how these features translate into the riding experience you’re after.

    Suspension Design: The Heart of the Machine

    The suspension platform is where manufacturers differentiate themselves, and whilst the names might sound intimidating, the concepts are straightforward. Horst link designs (used by brands like Specialized) excel at isolating pedalling forces from suspension movement, giving you that responsive, direct feel on climbs. Virtual Pivot Point (VPP) systems, favoured by Santa Cruz and Intense, use counter-rotating links to create an efficient pedalling platform whilst remaining supple over bumps. Single pivot designs offer simplicity and a more active feel, which some riders prefer for technical climbing.

    What does this mean for you? A well-designed suspension platform – regardless of type – will feel invisible when you’re hammering up a climb, yet spring to life the moment you hit rough terrain. That’s the magic you’re looking for.

    Travel Sweet Spot: Finding Your Goldilocks Zone

    Modern cross country full suspension mountain bikes typically run 100-120mm of travel front and rear. 100mm bikes are pure efficiency machines – they’re lighter, stiffer, and absolutely fly on smooth trails and race courses. If you’re a racer at heart or your local trails are relatively smooth, this is your weapon of choice.

    120mm bikes represent the “downcountry” end of the spectrum. They’re marginally heavier but dramatically more capable on technical descents, offering confidence when the trail gets proper gnarly. For riders who want one bike that handles everything from race day to weekend epics on challenging terrain, that extra 20mm makes a world of difference.

    Geometry Numbers That Actually Matter

    Don’t let geometry charts intimidate you. Here’s what you need to know: head angles on XC bikes sit around 67-69 degrees – steeper than trail bikes, which makes them quick to steer and responsive in tight sections. Reach measurements determine how stretched out you’ll be; modern XC bikes have grown slightly longer for stability, but they’re still more compact than trail bikes.

    The beautiful thing about contemporary XC geometry is that it creates a bike that feels nimble and playful when you’re picking through technical climbs, yet remains composed when you’re absolutely sending it on the descents.

    These technical details translate into real sensations – the snap out of corners, the flow through rock gardens, the way the bike seems to read your mind on twisty singletrack.

    XC racing

    Weight Considerations: Why It Matters (and Why It Doesn’t Always)

    Yes, XC bikes are light – often under 11kg for high-end models. But here’s the truth: that ultra-light race machine won’t necessarily make you faster if the suspension is harsh or the geometry doesn’t suit your riding style. A slightly heavier bike with supple suspension and confidence-inspiring geometry will be faster on real trails every single time.

    Weight matters most when you’re grinding up long climbs or accelerating out of corners. For everything else, suspension performance and geometry trump pure weight savings.

    Key Features to Look For

    When you’re comparing bikes and trying to separate marketing hype from genuine value, focus on these elements that genuinely impact your riding experience.

    Dropper Posts: Now Essential, Not Optional

    A few years ago, dropper posts on XC bikes were controversial. Today, they’re absolutely essential. Being able to drop your saddle on descents transforms the bike’s capability, giving you room to move, confidence to tackle steep sections, and the freedom to ride more aggressively. Any modern XC bike worth considering should either come with a dropper post or have routing for one.

    Wheel Size Debate: The 29″ Domination

    The wheel size debate is effectively over – 29″ wheels have won decisively in the XC world. The rollover capability, momentum retention, and traction benefits are simply too significant to ignore. Unless you’re particularly short (under 5’3″) and struggling with fit, 29″ is the way forward. Even the World Cup racers have made the switch, and these are people whose livelihoods depend on going fast.

    Tyre Clearance: Future-Proofing Your Purchase

    Here’s something many buyers overlook: tyre clearance. Modern XC bikes should accommodate tyres up to 2.4″ wide, giving you options. Want to run lightweight 2.2″ race tyres for your local club race? Brilliant. Need to fit burlier 2.35″ rubber for that rocky trail centre? You’re covered. This flexibility is invaluable.

    Components Worth Investing In

    Not all components are created equal, and knowing where to spend (and where to save) can stretch your budget significantly.

    Suspension: Worth Every Penny
    This is where you should invest. Quality suspension from Fox, RockShox, or DVO transforms the riding experience. The difference between budget and premium dampers isn’t just about tuning – it’s about consistency, serviceability, and longevity. A bike with excellent suspension but modest components elsewhere will outperform the reverse every single time.

    Drivetrain: Mid-Tier Is Absolutely Fine
    SRAM GX or Shimano SLX/Deore perform brilliantly for 95% of riders. Yes, XX1 and XTR shift slightly more crisply and weigh less, but the performance gap is minimal compared to the price difference. Save your money here.

    Brakes: Don’t Skimp
    Reliable, powerful brakes are non-negotiable. Shimano XT/SLX or SRAM Guide/Level provide excellent stopping power and modulation. You need confidence on descents, and good brakes deliver that security.

    Cockpit Components: Upgrade Later
    Bars, stems, and grips are easy to swap. If a bike has everything else right but comes with basic cockpit components, that’s perfectly acceptable. These are inexpensive upgrades you can tackle when you’ve dialled in your position.

    Pro Tip: A bike with solid suspension but budget finishing kit will outperform the reverse every time. Prioritise the frame and suspension above all else.

    Cross country MTB rider

    The XC vs Downcountry Decision

    The line between pure XC and downcountry has become wonderfully blurred, which means more options for you – but also potentially more confusion. Let’s clear that up.

    Pure XC: For Racers and Efficiency Lovers

    Characteristics:

    • 100-110mm travel
    • Steeper geometry (68-69° head angle)
    • Lighter weight (under 11kg)
    • Firmer suspension tune
    • Narrower tyre clearance

    Best for: Riders who prioritise climbing efficiency, race regularly, or ride predominantly smooth to moderately technical trails. If you live for Strava segments, crave that direct, responsive feel, and the word “efficient” makes your heart race, this is your category.

    Downcountry: More Capability, Slight Weight Penalty

    Characteristics:

    • 115-120mm travel
    • Slacker geometry (67-68° head angle)
    • Slightly heavier (11-12kg)
    • More supple suspension
    • Wider tyre clearance

    Best for: Riders who want one bike for weekend epics on varied terrain, appreciate descending confidence, and occasionally ride trails that verge on trail bike territory. If you love long adventure rides where the trail conditions are unpredictable, this is your sweet spot.

    Which One Are You?

    Go Pure XC if: You’re planning to race (or think you might), you value every watt of pedalling efficiency, your local trails are relatively smooth, and you already own other bikes for rougher riding.

    Go Downcountry if: You want your XC bike to be your primary mountain bike, you ride varied terrain regularly, technical descents excite you as much as climbs, and you value confidence over marginal weight savings.

    Real-World Scenarios: Your XC Bike Journey

    Let’s talk about what actually happens when you invest in a proper cross country full suspension mountain bike. These aren’t just specifications and features – they’re real transformations in your riding life.

    Scenario 1: The Weekend Warrior

    Meet Sarah: Works in marketing, spends Monday to Friday dreaming about Saturday morning rides. She’s been riding a decent hardtail for two years and loves it, but she’s finding herself limited by the bike rather than her fitness. Technical sections slow her down, and she’s been dropping off the back of her riding group on rougher trails.

    What an XC bike unlocked for her: Sarah invested in a 120mm downcountry bike and everything changed. Suddenly those technical climbs that forced her to dismount became rideable challenges. The descents she approached cautiously became opportunities to let loose. Her Saturday morning rides grew from 25km to 40km because she was having too much fun to stop.

    The feeling: “That moment when you realise you’ve just ridden further and faster than ever before, but you’re smiling too much to care about the numbers. I keep finding excuses to extend my rides because I don’t want them to end.”

    Scenario 2: The Race-Curious Rider

    Meet James: Fit, loves pushing himself, and has been toying with the idea of trying a local XC race but feels intimidated. His trail bike is brilliant, but it’s not exactly race-ready, and he’s been making excuses.

    What an XC bike provided: James bought a 100mm race-oriented XC bike specifically to force himself to enter his first event. The bike gave him confidence – this was the right tool for the job. He started with a local club race, finished mid-pack, and was immediately hooked. Six months later, he’s racing regularly, training with purpose, and has found a whole community he didn’t know existed.

    The experience: “Your first race podium – even if it’s just third in your age category – hits different. The personal records, the tactical battles, the suffering that somehow feels good… I genuinely look forward to 6am training rides now. The bike didn’t just get me into racing; it introduced me to the best riding community I’ve ever been part of.”

    Scenario 3: The Trail Explorer

    Meet Tom: Loves discovering new routes, plans weekend adventures, and has a list of “bucket list” rides that keeps growing. His current bike handles most things, but there are rides he’s avoiding because they involve too much climbing or too many kilometres.

    What an XC bike enabled: Tom chose a versatile 120mm XC bike and suddenly those intimidating 60km epics with 2,000m of climbing became not just possible, but genuinely enjoyable. Remote trails that required huge pedalling efforts to access were now within reach. He started ticking off those bucket list rides and adding more ambitious ones.

    The adventure: “Finally riding that epic backcountry loop you’ve bookmarked for years… arriving at the summit with energy to spare instead of being completely cooked… having the fitness and the bike to say ‘yes’ to rides you would’ve declined before. My riding world has literally expanded.”

    “An XC bike doesn’t just change how you ride – it changes which rides are possible.”

    Budget Considerations & Value

    Let’s talk money. XC full suspension bikes span a huge price range, and understanding where the value lies helps you make a smart decision rather than simply maxing out your budget.

    Entry-Level (£2,000-3,500): Strong Foundations

    At this price point, you’re looking at aluminium frames with solid but basic suspension (often RockShox Recon/Judy or entry Fox), 1×11 or 1×12 drivetrains, and typically house-brand finishing kit.

    What you get: A genuinely capable XC bike that will absolutely transform your riding compared to a hardtail or trail bike. The fundamentals are sound.

    What you sacrifice: Weight (these bikes often sit around 13-14kg), suspension performance (less adjustment, simpler damping), and component longevity. You’ll likely upgrade contact points fairly quickly.

    Worth it if: You’re new to XC riding, unsure if it’s your long-term passion, or happy to upgrade components over time as budget allows.

    Mid-Range (£3,500-5,500): The Sweet Spot

    This is where the magic happens. Carbon frames become standard, suspension quality jumps dramatically (Fox Performance or RockShox Pike/SID), drivetrains shift to SRAM GX/NX or Shimano SLX/XT, and finishing kit improves significantly.

    What you get: A bike that weighs 11-12kg, has excellent suspension performance with proper adjustment range, reliable components that last, and geometry refined by years of development. These bikes genuinely compete at club race level and handle serious trail riding.

    What you sacrifice: Not much, honestly. These bikes represent outstanding value. You’re missing the absolute lightest components and the last 500g of weight savings, but the performance gap to top-tier bikes is remarkably small.

    Worth it if: XC riding is your primary passion, you ride regularly (at least weekly), and you want a bike that won’t limit your progression. This is where most serious XC riders should invest.

    High-End (£5,500+): Marginal Gains vs Major Investment

    Top-tier XC bikes are extraordinary machines: sub-11kg, Fox Factory or RockShox Ultimate suspension, SRAM XX1/X01 or Shimano XTR drivetrains, carbon wheels, and obsessive attention to every detail.

    What you get: The best of everything. Weight savings everywhere, the most sophisticated suspension damping available, precise shifting under any conditions, and that intangible premium feel. These bikes accelerate harder, climb easier, and handle perfectly.

    What you sacrifice: A significant chunk of money for gains that matter most at competitive race level. The performance improvement over mid-range bikes exists, but it’s incremental rather than transformational for most riders.

    Worth it if: You’re racing seriously and results matter, weight and performance are worth the investment, or you simply want the best tool possible and have the budget. No judgement here – premium bikes are special.

    The Used Market: Hidden Value

    Don’t overlook previous-generation bikes or quality used options. XC bike development is incremental – a two-year-old top-spec bike often outperforms a brand new entry-level model and costs similar money. Check frame condition carefully, budget for suspension service, and you can land extraordinary value.

    Cost per smile philosophy: The best bike isn’t the most expensive one – it’s the one that gets you out riding most often and puts the biggest grin on your face. A £3,500 bike you ride three times a week delivers more value than a £7,000 bike that intimidates you into riding it carefully once a fortnight.

    Making It Real: Your Path to the Perfect Bike

    You’ve got the knowledge. Now let’s talk about actually finding and buying your ideal cross country full suspension mountain bike.

    Demo Days and Test Rides: Why They Matter

    Reading reviews and watching videos helps, but nothing replaces throwing your leg over a bike and riding it. Modern XC bikes feel remarkably different from one another – suspension character, geometry, and handling all vary significantly between brands and models.

    Attend demo days at your local trails, visit shops that offer test rides, or borrow a mate’s bike for an hour. Pay attention to how the bike climbs, how it corners, and – crucially – whether you’re smiling. That emotional response matters more than spec sheets.

    Finding Your Size

    XC bike sizing has evolved. Modern bikes run longer reaches, so you might size down from what you’d expect. Generally:

    • Prioritise standover clearance and cockpit comfort for technical climbing
    • You should be able to move your weight back significantly without hitting the saddle
    • When seated, your elbows should have a natural bend
    • The reach should feel slightly long initially – you’ll grow into it

    Most brands publish detailed geometry charts and sizing guides. Use them, but don’t stress excessively – modern sizing tends to be forgiving, and small adjustments (stem length, bar width) fine-tune fit easily.

    The “One Bike” Question

    Can a cross country full suspension mountain bike be your only ride? For many riders, absolutely yes – especially if you lean toward the 120mm downcountry end of the spectrum. These bikes genuinely handle trail centres, natural terrain, marathon events, and races with equal competence.

    The exception: if you regularly ride bike parks or full-on enduro terrain, you’ll want something burlier alongside your XC bike. But for 80% of riders, a well-chosen XC full suspension bike is remarkably versatile.

    Timing Your Purchase: The Deal-Hunter’s Guide

    Bike pricing follows predictable patterns:

    • September-November: End of season sales, shops clearing stock for new models
    • January-February: Post-Christmas lull, retailers keen to move inventory
    • Model year transitions: When 2026 models arrive, 2025 models get discounted

    New doesn’t always mean better. Model changes are often cosmetic (new paint) or incremental (slightly revised geometry). A discounted previous-generation bike frequently represents better value than the latest model at full retail.

    Somewhere out there is your perfect cross country full suspension mountain bike – the one that’ll have you counting down the hours until your next ride, planning routes during work meetings, and boring your non-riding friends with enthusiastic descriptions of suspension kinematics.

    Your Next Chapter Starts Here

    Here’s what happens when you find the right cross country full suspension mountain bike: riding stops being something you do occasionally and becomes something you structure your life around. Those Saturday morning rides become sacred. You start checking trail conditions obsessively. You discover muscles you didn’t know existed. You join group rides and suddenly have a whole new social circle. You enter that first race, then the second, then you’re hooked.

    This time next month, you could be:

    • Setting new personal records on climbs that used to defeat you
    • Exploring trails that seemed too ambitious before
    • Joining the local XC racing scene and discovering your competitive side
    • Experiencing the fittest, strongest version of yourself
    • Simply enjoying the best rides of your life

    The transformation isn’t just about the bike – it’s about what the bike enables you to become. Fitter, more skilled, more confident, more adventurous. An XC full suspension bike is an investment in the rider you want to be.

    Ready to find your perfect XC steed? We’ve curated the best cross country full suspension mountain bike deals available right now entry-level giants that punch above their weight to podium-ready race machines that’ll have you questioning whether you’re actually this fast. Every bike listed represents genuine value and capability, carefully selected by riders who understand what matters.

    View Best Current Cross Country Full Suspension Mountain Bike Deals →

    These deals won’t last forever, and riding season waits for no one. Somewhere in that list is the bike that’ll change your riding life. Your next adventure, your fastest ride, your most epic day on the trails – it all starts with clicking that button.

    The trails are waiting. Let’s find you the perfect weapon to tackle them.

  • What Bike Should I Get? A Complete Buying Guide

    Choosing your first bike or upgrading to a new one should be exciting, not stressful. Yes, there are loads of options out there. Road bikes, gravel bikes, mountain bikes, hybrids – the list goes on. But here’s the good news: each type is designed for specific kinds of riding. So what bike should you get? It all comes down to where and how you want to ride.

    Let’s break down the main bike categories together. Then we’ll dive into mountain bikes, which offer some of the most fun and varied riding experiences you can have on two wheels.

    Quick Overview: Other Bike Types

    Before we get to the exciting stuff (mountain bikes!), let’s quickly cover the other main bike categories.

    What bike should I get: road bikes

    Road Bikes are built for speed on tarmac. Think thin tyres, drop handlebars, and super lightweight frames. They’re brilliant for fitness rides, group rides, and racing on smooth roads. But they’re definitely not happy on rough surfaces. If you only ride on tarmac and love going fast, a road bike might be calling your name.

    What bike should I get: gravel bikes

    Gravel Bikes are like road bikes that said “let’s have more fun.” They have wider tyres and can handle dirt roads and light trails. They offer more comfort and way more versatility. Lots of riders love them for bikepacking adventures. They’re perfect if you want one bike for both tarmac and unpaved roads.

    Hybrid Bikes are the friendly middle ground between road and mountain bikes. Flat handlebars, medium-width tyres, and a comfortable upright position. They’re great for casual rides around town, cycle paths, and easy trails. If you want something simple and versatile for errands and relaxed recreation, hybrids are solid choices.

    Commuter Bikes are your practical daily drivers. They often come with mudguards, racks, and lights already fitted. They prioritise getting you places comfortably over going fast. Perfect for your daily commute or running errands around the city.

    Now let’s talk about the really fun stuff: mountain bikes!

    Mountain Bikes: Your Ticket to Adventure

    Mountain bikes are designed to take you off the beaten path. They have wide, knobbly tyres that grip dirt and rocks and suspension that smooths out bumps and roots. They have flat handlebars that give you brilliant control. And they’re built tough to handle whatever the trail throws at you.

    But here’s where it gets interesting. “Mountain bike” is actually a whole family of bikes. There are several different types, each designed for a specific style of riding. The key is matching the bike to the kind of fun you want to have.


    Cross Country (XC) Mountain Bikes

    The Speedy Climber

    XC bikes are the lightest and fastest mountain bikes. They typically have 100-120mm of suspension travel. Some are hardtails with only front suspension, which keeps them even lighter and more efficient.

    These bikes love climbing and covering big distances. The geometry puts you in a forward position that helps you power up hills. Everything is designed for speed and efficiency. Lightweight frames. Responsive handling. Firm suspension.

    XC bikes are fantastic if you love the challenge of climbing and want to go fast. They shine on smoother trails and fire roads. They’re perfect for racing or long adventure rides. The trade-off? They can feel a bit harsh on super rough, technical descents. That’s not really their thing.

    Get an XC bike if: You love the fitness aspect of riding. Climbing makes you happy. You want to race or do long endurance rides. Your local trails are relatively smooth without crazy technical features.


    Down Country Mountain Bikes

    The Fast Trail Bike

    Down country bikes are the newest category in mountain biking, sitting perfectly between XC race bikes and trail bikes. Think of them as XC bikes that have been to the gym and decided they want more fun on descents.

    They typically have 110-130mm of suspension travel. More than pure XC bikes but less than full trail bikes. The geometry is progressive with slacker head angles than traditional XC bikes. You get the climbing efficiency of an XC bike with noticeably better descending capability.

    These bikes love fast, flowy trails. They’re lightweight enough to climb brilliantly. The extra travel and slacker angles give you confidence on technical descents. You sit in a more balanced position than on pure XC bikes, making them more comfortable for longer rides.

    Down country bikes are perfect for riders who want speed and efficiency but also ride trails with technical features. They’re brilliant for marathon racing or big adventure rides where you’ll encounter varied terrain. They won’t plough through gnarly rock gardens like a trail bike, but they’ll handle more than traditional XC bikes whilst still being properly quick.

    The trade-off? They’re slightly heavier than pure XC bikes and slightly less capable than trail bikes on really rough terrain. They’re specialists in the middle ground.

    Get a down country bike if: You love going fast and climbing efficiently. Your trails have some technical sections but aren’t super gnarly. You want one bike for racing and trail riding. You prioritise speed but want more capability than a pure XC bike.


    Trail Mountain Bikes

    The Fun-For-Everything Bike

    Trail bikes are the most popular mountain bikes, and it’s easy to see why. They’re like the golden retriever of bikes—friendly, capable, and ready for anything. With 120-150mm of suspension travel, they climb well enough and descend confidently. They’re genuinely fun on all kinds of terrain.

    The geometry is perfectly balanced. Comfortable enough for long climbs. Playful enough for technical descents. You sit in a natural, relaxed position. The suspension handles both climbing efficiency and bumpy trails beautifully. These bikes just feel good to ride.

    Trail bikes handle everything from mellow cross-country loops to rowdier bike park features. You can ride for hours without getting beat up. Then you can confidently descend technical terrain. They’re the best at exactly nothing, which makes them brilliant at everything.

    Trail bikes match how most people actually want to ride. A little climbing, some descending, lots of playing around. If you’re buying your first mountain bike or want one bike that does it all, this is absolutely your answer.

    Get a trail bike if: You want maximum versatility. You ride different kinds of terrain. You’re not totally sure what style you’ll love most. You want one bike that makes you smile no matter what.


    What bike should I get: enduro bikes

    Enduro Mountain Bikes

    The Downhill Enthusiast

    Enduro bikes are for riders who live for the descents. They have 150-180mm of suspension travel. The geometry is slack and stable at speed. Everything about them says “let’s go fast downhill.”

    The extra suspension soaks up big hits and rough terrain. The slack angles keep you balanced on steep sections. The longer wheelbase adds stability when you’re flying. These bikes give you the confidence to ride faster and tackle bigger features than you ever thought possible.

    Now, enduro bikes still climb. They’re definitely heavier than trail bikes, so you’ll work a bit harder going up. But many have clever features like adjustable geometry or climb switches to help. They’re designed for riders who see climbing as the price of admission for amazing descents—and totally worth it.

    Enduro bikes are for riders who prioritize rowdy, technical descending. If you regularly ride steep, challenging trails, an enduro bike will feel like a superpower. But if your local trails are pretty mellow, it might be more bike than you need.

    Get an enduro bike if: You’re comfortable on technical terrain. You get excited about steep, challenging descents. You’re happy to work harder on climbs for way more fun on the way down. Your local trails have serious elevation and technical features.


    What bike should I get: downhill bikes

    Downhill Mountain Bikes

    The Pure Adrenaline Machine

    Downhill bikes have one job: getting you down the mountain as fast as humanly possible. With 180-220mm of suspension travel and geometry designed purely for descending, these bikes are serious tools for serious gravity riders.

    They’re heavy – usually 35-40 pounds or more. They have beefy dual-crown forks. The geometry makes pedalling uphill basically impossible. But when you’re dropping into a downhill run? Nothing else comes close. They’re stable at ridiculous speeds. They absorb massive impacts like they’re nothing. They let you push your limits in ways other bikes just can’t.

    Here’s the catch: downhill bikes need lifts or shuttles to get you to the top. You really can’t pedal them uphill for any distance. They’re specifically for bike parks, shuttle days, and pure gravity riding.

    Get a downhill bike if: You have regular access to bike parks or shuttle services. You want to focus purely on descending. You already own another bike for regular trail riding. You’re serious about gravity riding or downhill racing.


    Dirt Jump Mountain Bikes

    The Playground Specialist

    Dirt jump bikes are completely different beasts. They’re not for trail riding at all. These bikes are designed for one thing: launching yourself into the air and landing smoothly. Jumps, pump tracks, skate parks – that’s their natural habitat.

    They’re compact and tough. Usually running 26″ or 24″ wheels for maximum manoeuvrability in the air. Short travel forks (80-100mm) or sometimes rigid forks. Single-speed or minimal gearing because you don’t need gears when you’re flying. The frames are massively overbuilt to handle the impacts of landing jumps repeatedly.

    The geometry is designed for tricks and control in the air, not pedalling efficiency. Low standover height so you can move around easily. Short wheelbase for quick movements. Everything about them prioritises durability and airtime control.

    Dirt jump bikes are brilliant fun if you have access to dirt jumps, pump tracks, or skate parks. They’re also fantastic for learning bike control and confidence in the air. The skills you develop transfer beautifully to other types of mountain biking.

    But they’re terrible for anything else. You can’t really ride trails on them. Climbing is miserable. They’re purely for sessioning features and having a laugh with mates at the local jumps.

    Get a dirt jump bike if: You have regular access to dirt jumps or pump tracks. You love jumping and want to progress your skills. You already own a trail bike for regular riding. You want to focus purely on tricks and airtime. You’re looking for a second bike to complement your trail riding.


    E-Bikes (Electric Mountain Bikes)

    E-bikes – or eMTBs – have a motor that assists your pedalling, and they’re absolutely brilliant fun. They come in all the same categories as regular mountain bikes (XC, trail, enduro) but with a battery and motor that help you climb faster and ride longer. Don’t think of them as “cheating” – you’re still pedalling and working hard, but you can tackle steeper climbs, ride with faster mates, or simply fit in more descents per ride. They’re heavier than regular bikes (usually around 20-25kg) and more expensive, typically starting around £2,500 for entry-level models. But if you want to explore more terrain, recover from an injury whilst staying active, or just have more fun without being completely knackered, an e-bike might be perfect. The battery range varies, but most give you 2-4 hours of riding depending on how much assistance you use.

    Let’s Talk About Budget

    Money matters, so let’s be real about what you can expect at different price points.

    Under £500: You’re looking at basic hardtail mountain bikes or entry-level hybrids. These work fine for casual riding on easy trails and cycle paths. But they’ll have heavier frames and basic components. Perfect for getting started or very occasional riding.

    £500-£1,000: This is where things get interesting. You can find decent hardtail mountain bikes with better components. Some entry-level full-suspension bikes appear at the top of this range. This is a solid budget for beginners who want a bike that’ll grow with them.

    £1,000-£2,000: Now you’re in the sweet spot for quality trail bikes. You’ll find good full-suspension bikes with reliable components. These bikes will handle real mountain biking well. Most recreational riders will be happy in this range.

    £2,000-£4,000: This is where serious mountain bikers live. You get lighter frames, better suspension, and components that perform really well. Trail and enduro bikes in this range are fantastic. If you’re riding regularly and know you love it, this investment makes sense.

    £4,000+: High-end territory. Carbon frames, top-tier suspension, premium components. The bikes are noticeably lighter and perform better. But the improvements are incremental. These are for serious enthusiasts and racers who want the best.

    Don’t forget ongoing costs! Budget for a helmet, gloves, and pedals right away. Over time you’ll want spare tubes, a pump, and basic tools. Plan to spend another £200-£400 on essential kit when you get your bike.

    So what bike should you actually get?

    Here’s a friendly decision framework to help you out:

    Start with where you’ll ride. Do you have mountain bike trails nearby? Are they smooth and flowy or steep and gnarly? Do you live near a bike park? Your local terrain is your best guide.

    Think about what gets you excited. Does the challenge of a tough climb make you happy? Do you daydream about bombing down technical descents? Or do you just want to explore trails and enjoy being outside? Follow your excitement.

    Consider your experience level. If you’re new to mountain biking, start with a trail bike. It’ll let you explore everything before you specialize. If you’re experienced and know exactly what you love, go for the bike that matches your passion.

    Set a realistic budget. Be honest about what you can spend. Remember that a £1,500 bike you can afford is way better than a £4,000 bike that stresses you out financially. You can always upgrade later.

    Be honest about reality versus fantasy. We all imagine ourselves doing epic rides. But what will you actually do most weekends? Choose the bike for your real riding, not your imagined riding. You’ll be much happier.

    The Bottom Line

    The best bike is the one that makes you want to ride. Not the one that looks coolest, or what your buddy rides or even the most expensive one. The one that matches your actual riding style and makes you smile.

    For most people getting into mountain biking, a trail bike is the perfect starting point. It’s versatile enough to let you try everything. As you ride more, you’ll discover what you love most. Then you can get more specific with your next bike.

    But here’s the real secret: any bike is better than no bike. Start with something that fits your budget and local trails. Then get out there and ride. Your experience will naturally guide you toward your perfect bike over time.

    So what bike should you get? Honestly, get the one that makes you excited to wake up early on Saturday morning and go ride. That’s the right bike.

  • Types of Mountain Bike

    What’s the difference?

    Mountain biking isn’t one-size-fits-all. From pedaling uphill marathons to launching off drops, different types of mountain bike exist for different riding styles. The variety can seem overwhelming at first—cross country, trail, enduro, downhill, and even subcategories within those. But understanding the different types of mountain bike will help you find the perfect ride for how you actually want to ride.

    Let’s break down the major types of mountain bike, what makes each one unique, and who they’re really designed for.

    Types of Mountain Bike: Cross Country

    Cross Country (XC)

    The Marathon Runner

    Cross country bikes are built for one thing: covering ground quickly. These bikes are the lightest and most efficient types of mountain bike. They have 100-120mm of suspension travel. That’s the amount the suspension can compress to absorb bumps. Some XC bikes are hardtails, which means they only have front suspension.

    The geometry puts you in a forward position. This helps you pedal harder and climb faster. The front wheel sits close to your body. This makes the bike feel quick and responsive. Everything about an XC bike says “go faster.” Carbon frames keep weight down. Narrow handlebars improve aerodynamics. Firm suspension reduces energy loss. Many have a lockout feature that stops the suspension from moving on smooth climbs.

    Modern XC bikes have changed a lot. Today’s “downcountry” bikes blur the line between XC and trail bikes. They handle descents better without losing too much climbing speed. But traditional XC bikes remain focused on one goal: efficiency.

    Best for: Competitive racers. Fitness-focused riders who love logging miles. Anyone who loves efficient climbing. If you see technical descents as obstacles rather than the main event, XC is for you.

    Types of Mountain Bike: Trail

    Trail

    The All-Rounder

    Trail bikes are the most popular types of mountain bike. It’s easy to see why. With 120-150mm of suspension travel, these bikes balance climbing and descending. They’re good at everything without major compromises.

    The geometry sits in the middle. It’s slack enough to feel stable at speed. It’s steep enough to climb without fighting the bike. You can pedal uphill for hours. Then you can descend technical terrain with confidence.

    What makes trail bikes special is their versatility. They’re light enough for cross-country loops. They’re capable enough for bike park features. You can manual over obstacles pump through berms. You can have fun without the bike feeling too heavy or sluggish. The suspension balances support for pedaling with smoothness over rough terrain.

    Trail bikes have the widest appeal. They match how most people actually ride. You climb, you descend, you play around on varied terrain. They’re not the fastest climbers. They’re not the most confidence-inspiring descenders. But they’re good enough at both that you’ll rarely feel limited.

    Best for: Weekend warriors. Riders exploring local trails. Anyone who wants one bike that handles everything well. If you’re not sure what kind of rider you are yet, start here.

    All-Mountain

    The Crossover

    All-mountain bikes sit between trail and enduro bikes. They typically have 140-160mm of travel. The term is less common now. “Trail” has expanded to include lighter all-mountain bikes. “Enduro” has claimed the more aggressive ones. But the concept remains useful.

    These bikes handle steep, sustained climbs better than enduro bikes. They offer more confidence on rowdy descents than trail bikes. They’re ideal for big mountain adventures. Both the ups and downs matter equally.

    Best for: Backcountry explorers. Riders tackling serious elevation in remote areas. Anyone doing multi-hour rides with significant technical descending.

    Types of Mountain Bike: Enduro

    Enduro

    The Descending Specialist

    Enduro bikes are where things get serious about going downhill. With 150-180mm of suspension travel, these bikes are built for aggressive, high-speed descending. They’re named after the racing discipline. Riders pedal between timed downhill stages. Only the descents count. But you still need to pedal yourself to each stage start.

    The geometry is designed for stability at speed. The front wheel sits farther from your body. This improves weight distribution on steep descents. The increased suspension absorbs bigger impacts. The overall build is tougher. Stronger wheels. More robust frames. Beefier components.

    But enduro bikes aren’t downhill bikes. They still climb. Many have adjustable geometry. Flip chips can steepen angles for climbing. Suspension platforms firm up the shock for better pedaling. Yes, they’re heavier and slower uphill than trail bikes. But they’re designed for riders who view climbing as the price of admission for great descents.

    Modern enduro bikes often feature adjustable settings. Many use “climb switches” that firm up the rear shock. This reduces bobbing and improves efficiency on fire roads. The best enduro bikes disappear beneath you on descents. They give you confidence to push harder. You can ride faster on terrain that would feel sketchy on a trail bike.

    Best for: Advanced riders who prioritize technical descending. Those regularly tackling steep and challenging terrain. Enduro racers. Riders who shuttle or use lifts for some laps but still pedal for others. If you think “I wish my bike felt more stable on this descent,” enduro might be your answer.

    Types of Mountain Bike: Downhill

    Downhill (DH)

    The Gravity Missile

    Downhill bikes have one purpose: getting down the mountain as fast as possible. With 180-220mm of suspension travel, these are the most extreme types of mountain bike. They have dual-crown forks. These clamp the fork legs above and below the head tube for extra stiffness. The geometry is so slack you’d never pedal uphill. These bikes are built exclusively for lift-accessed or shuttle-accessed descending.

    Everything prioritizes stability, traction, and control at high speeds. The long wheelbase and slack angles make the bike stable at speed. But they make it nearly impossible to maneuver slowly or uphill. They’re heavy—35-40+ pounds. Weight doesn’t matter when you’re not pedaling up. The extra bulk comes from stronger, more durable parts. These are designed to withstand repeated big hits.

    DH bikes often use coil shocks instead of air shocks. Coil shocks are more consistent and plush through repeated hits. The suspension is tuned for maximum traction and impact absorption. Not pedaling efficiency. Even the gearing reflects the mission. You might have seven speeds total. Just enough to adjust for changing gradient on the way down.

    Best for: Bike park enthusiasts. Gravity-focused riders with consistent access to lifts or shuttles. Downhill racers. If you’ve separated climbing and descending entirely, this is your bike. You need access to the top of the mountain without pedaling.

    So Which One Should You Choose?

    Start by honestly thinking about what you want from mountain biking. Are you drawn to the fitness and challenge of long climbs? Do you seek out technical descents and dream about flow trails? Or do you just want to explore local trails and have fun?

    For most riders starting out, a trail bike is the safest bet. It won’t be the best at anything. But it’ll be good enough at everything. You can explore the full range of mountain biking before specializing. As you ride more, you’ll discover what you love most. That will point you toward your next bike.

    The beautiful thing about modern mountain biking is simple. There’s a bike made specifically for however you want to ride. Understanding the different types of mountain bike helps you make the right choice. The challenge—and the fun—is figuring out exactly what that is for you.

  • Hardtail vs Full Suspension Mountain Bikes

    Which is right for you?

    Choosing between hardtail vs full suspension mountain bikes is a big decision. Both designs have fans for good reason. Each type works best in different situations. Whether you’re new to mountain biking or adding another bike to your collection, understanding these two designs will help you choose wisely.

    Full Suspension Mountain Bike

    What’s the Difference between Hardtail vs Full Suspension?

    Let’s start with the basics. A hardtail mountain bike has front suspension (a fork) but no rear suspension. The frame is simple. It’s a traditional frame design with a suspension fork on the front. A full suspension bike has both front and rear suspension. It has a rear shock and a frame built with pivots. These pivots let the rear wheel move and absorb bumps. Let’s go into the specifics of hardtail vs full suspension mountain bikes.

    Hardtail Mountain Bike

    Hardtail Mountain Bikes

    The Good Points

    You get more for your money – This is the hardtail’s biggest selling point. Without expensive rear suspension parts, you get a better bike for less money. A £1,500 hardtail will have much better parts than a full suspension bike at the same price. You’ll get a better drivetrain, brakes, and fork. For riders on a budget, this means you don’t have to compromise on the important parts.

    Simple and reliable – Fewer moving parts mean fewer problems. There’s no rear shock to service. No suspension pivots to maintain. No linkage bearings to worry about. This makes hardtails great for riders who want to ride more and wrench less. Maintenance is simple. Look after your fork, keep your drivetrain clean, and you’re sorted.

    Better for climbing – Hardtails shine when you’re climbing. When you’re grinding up a steep climb or powering along fire roads, the rigid rear end helps. Without rear suspension, all your pedalling power goes into moving forward. There’s no energy loss from suspension movement (called “pedal bob”). You’ll often pass full suspension riders on long climbs.

    Lighter weight – Without a rear shock and extra frame parts, hardtails are lighter. They’re typically 1 to 2 kilograms lighter than similar full suspension bikes. You’ll notice this when carrying your bike upstairs, lifting it over obstacles, or speeding up out of corners.

    Builds your skills – Learning on a hardtail teaches you a lot. Without rear suspension to smooth out mistakes, you learn better line choice. You learn to shift your weight properly. You master techniques like manuals and pumping terrain. Many pro riders say their hardtail days built the skills that made them faster.

    Cheap to run – Over time, the savings add up. A full suspension bike needs a rear shock service every 50 hours of riding. That costs £100 or more. Plus regular pivot bearing maintenance. A hardtail’s running costs are minimal. This makes them brilliant for riders who ride a lot or want to save money.

    The Bad Points

    Rougher ride – Here’s the trade-off. Without rear suspension, every root, rock, and bump goes straight through the frame to your body. On rough, technical trails, this can be hard going. Your arms, hands, and lower back absorb all the impacts. After several hours on rough trails, you’ll definitely feel it.

    Less grip on technical descents – When trails get really rough, a hardtail’s rear wheel bounces over obstacles. It doesn’t track smoothly. This means less control and confidence. The rear tyre spends less time touching the ground. You get reduced braking and cornering grip when you need it most.

    Not for all terrain – Hardtails are capable bikes, but they have limits. Want to ride the local bike park? Tackle black-graded downhill runs? Ride extremely technical terrain? A hardtail will hold you back. They’re not designed for the most aggressive riding.

    You get tired faster – The constant buzz and vibration from rough trails takes its toll. On longer rides with sustained technical sections, you’ll tire more quickly. This fatigue affects your concentration and bike handling. You might make more mistakes later in the ride.

    Full Suspension Mountain Bike

    Full Suspension Mountain Bikes

    The Good Points

    More comfortable – The rear shock absorbs trail chatter and bigger impacts. Comfort improves dramatically. You can ride longer and tackle rougher terrain. You’ll finish your rides feeling fresher. For riders who do big days or all-day rides, this comfort factor matters.

    Better grip and control – The rear wheel stays on the ground over rough terrain. Full suspension bikes provide better grip for braking, cornering, and climbing technical sections. The rear tyre tracks obstacles instead of bouncing over them. You get more control and confidence, especially on descents.

    Faster on rough descents – When the trail goes downhill and gets rough, full suspension bikes excel. You can carry more speed through technical sections. The suspension absorbs impacts for you. This lets you focus on line choice and bike control. You’re not just hanging on.

    Does everything – A good full suspension bike is versatile. It’ll handle your local trails, weekend trail centre visits, and alpine holidays. This versatility makes them excellent for riders who want one bike for everything.

    Easier on your body – For riders with back, wrist, or joint problems, full suspension makes a real difference. The improved comfort can be the difference between enjoying mountain biking and giving it up. The suspension absorbs impacts that would otherwise stress your body. This makes the sport more accessible long-term.

    More confidence – When you know your bike can handle anything, you ride with more confidence. This often means faster riding and more fun. You’re not constantly worrying about whether your bike is up to the task.

    The Bad Points

    Much more expensive – Quality rear suspension systems cost a lot. You’ll typically need to spend at least £2,000 for a decent full suspension bike. Budget full suspension bikes often make compromises that hurt performance.

    More maintenance – Rear shocks need regular servicing. Typically every 50 to 100 hours of riding for a basic service. You need a more thorough overhaul annually. Suspension pivots need checking and occasionally replacing. This adds up in time and money. You’ll need to be diligent about maintenance or pay for professional servicing.

    Extra weight – Those extra parts add up. Even high-end full suspension bikes are noticeably heavier than similar hardtails. You’ll feel this extra weight on climbs and when moving the bike around.

    Less efficient pedalling – Modern suspension designs have largely fixed this problem. But some energy is still lost to suspension movement when pedalling. Many riders use the shock’s lockout feature for smooth climbs and fire roads.

    More can go wrong – More complexity means more potential problems. Seized pivots, blown seals, or a failed shock can end your ride. Quality suspension is generally reliable, but the extra complexity is worth considering.

    Making Your Choice between Hardtail vs Full Suspension

    Choose a hardtail if you mainly ride cross-country terrain, smooth singletrack, or gravel paths. They’re brilliant for riders on a budget who want quality parts. Great for those who value simplicity and low maintenance. Perfect for anyone focusing on fitness and climbing. Hardtails are also excellent for developing your skills or if you enjoy a direct connection to the trail.

    Choose full suspension if your local trails are rough and technical. If you prioritise descending and comfort. If you want maximum versatility from one bike. They’re right for all-mountain and enduro riding, bike park visits, or if you’re willing to invest in a higher-end bike. Full suspension is also worth it if you have any physical issues that benefit from a more comfortable ride.

    Many experienced riders end up with both types. They use each for its strengths. There’s no universally correct answer. Just the right bike for your needs, riding style, and local trails. Think about where you’ll ride 80% of the time. Let that guide your decision on hardtail vs full suspension mountain bikes. Both hardtails and full suspension bikes can provide years of brilliant riding.